
Overview
In the following blog post, I discuss my progress with my project so far. I start out with a simple RLC circuit, go on to discuss the components, and derive a solution (using Mathematica) for a circuit with parameters that I have come up with. I then plot current as a function of time and discuss long-term structure in the output of the circuit, its relevance to my project, and my forward plan.
Progress
In my plan I discussed a simple RLC circuit that consists of a capacitor, voltage source, resistor, and an inductor. To easily visualize this, I have constructed a basic circuit diagram (Figure 1).
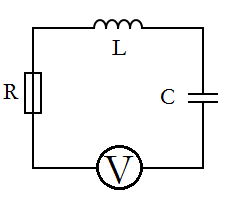 (Figure 1)
The differential equation that governs this RLC circuit is given by
 [1]
[1]
where L is the inductance, R is the resistance, C is the capacitance, I is the current,  is the resonant angular frequency,
  is an initial value dependent on the voltage source, and t is the time. The inductance (L), resistance (R), and capacitance (C)are all determined by their respective circuit components, which are easily changed out for different ones. depends on the inductance and capacitance, and its value is given by
 [2]
[2]
What we have left in terms of variables are current (I) and time (t). For our purposes, time is the independent variable, which leaves the current in the circuit at any time to be the dependent variable. Now that we have established this, we can solve our differential equation [1] for current as a function of time ( ).
).
In order to solve [1], I will use the equation solving powers of Mathematica. In particular, the DSolve function is used. When plugged into Mathematica, the input line looks like:
![\text{DSolve}\left[\frac{\text{Current}(t)}{\text{Capacitance}}+\text{Inductance} \text{Current}''(t)+\text{Resistance} \text{Current}'(t)=E_{0} \omega \cos (\omega t),\text{Current}(t),t\right]](https://pages.vassar.edu/magnes/wp-content/ql-cache/quicklatex.com-4fd6cd2ab6f0ba47fdfaab15b71e9d9e_l3.png "Rendered by QuickLaTeX.com") [3]
[3]
We must set values for resistance, inductance, capacitance, and . For this run through of the solution I chose the following arbitrary values:
- Inductance= 1 Henry
- Resistance= 10 ohms
- Capacitance= .1 farads
- = 1 Volt
When the command is run with the above values set, Mathematica generates the general solution, which is:
 [4]
[4]
First, lets make sure that this solution is reasonable. The known form of the solution to the equation for such a circuit is given by:
 [5]
[5]
The form of our equation [4] seems to match up pretty nicely with this known solution [5]. Now, lets examine [4] in more detail.
Our solution [4] looks a little daunting, but we can break it down into its components. The first two terms have constants that depend on the initial current running through the system, i.e. when  . However, we can approximate the equation by only looking at the last term, which is a superposition of sin and cosine functions along with a couple exponential terms thrown in. The reason that we can apply this approximation is that the first two terms “damp out” quickly, and thus have exponentially less of an effect as time progresses. The reader may still be curious to see how much of an effect these terms have on the current flowing through the system: to that I say don’t worry! After my initial approximation, I will solve for these constants and compare the two cases.
For now, we will deal with the approximate solution, which is:
 [6]
[6]
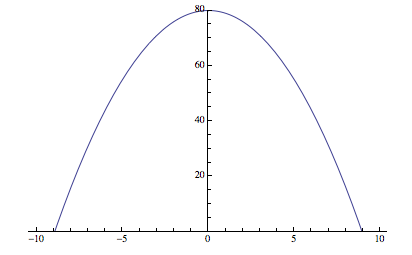
Now that we have this equation, we can use Mathematica to give us an idea of what the changing current looks like over a longer period of time. Figure 2 shows the current in the circuit as a function of time () plotted over a 30-second interval.
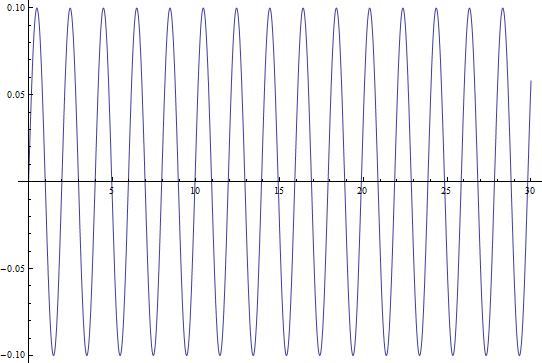 (Figure 2)
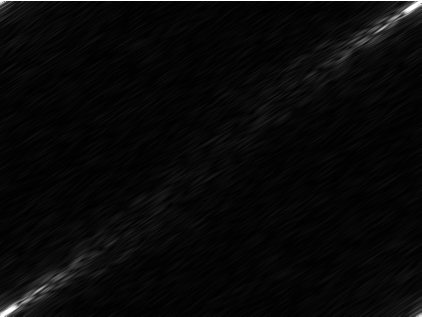
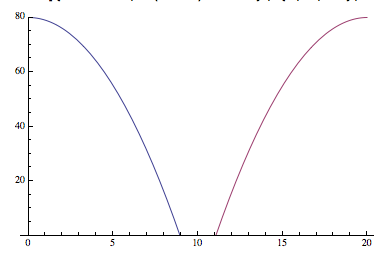
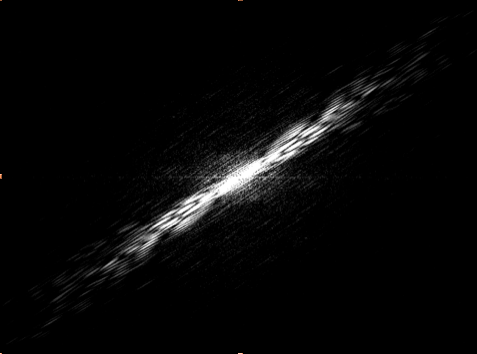
This looks like something we would expect! A sinusoidal wave that describes the changing current over time, just like our equations dictate. But, this is a short time-scale. What happens when we look at the changing current over a longer period of time? In Figure 3, I show the changing current over a longer time period (3000 seconds/50 minutes). In Figure 4, I repeat the process, but with the timescale being 5 years.
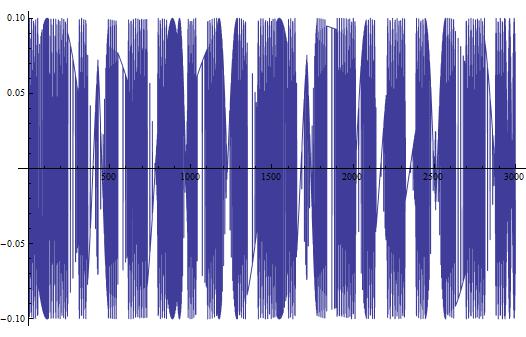 (Figure 3)
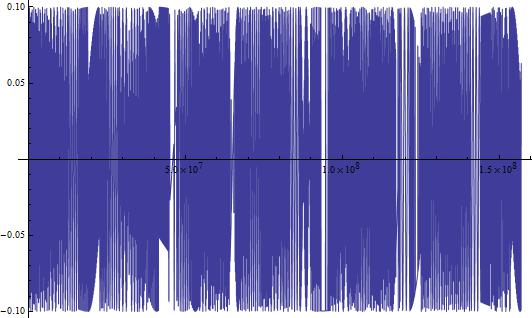 (Figure 4)
In both Figures 3 and 4, we see some very interesting long-term variations in the current. Why does this occur? Well to be honest, I am not completely certain. I do have a few ideas though:
- My first inclination is that the long-term variations are in part due to the approximation I made by removing the first two terms of Equation [4].
- My second idea is that these long-term structures are present due to a possible approximation Mathematica may have made when solving the differential equation.
- My third and last thought is that these variations are not an artifact of finding the solution, but truly do exist in this theoretical circuit I have chosen.
Why?
A question that the reader may have after looking at all of this is “Why is the long-term structure important?” The answer lies in the fact that RLC circuits are embedded in many electronic devices, including radios and televisions. For this reason, it is important to know the current they put out. We don’t really want something that has an unpredictable output in devices that are high-cost.
Forward Plan
To further investigate the reason for the long-term structure, I will first solve for the constants in Equation [4] and plot the graphs of current again. Hopefully this will provide some insight into the workings of the circuit. I may also alter the initial parameters (inductance, resistance, etc.) to see if this provides any insight. If not, then I will investigate Mathematica’s differential equation solving techniques and attempt to alter my solution in a way that provides a more accurate solution.
Resources
1. Circuit Diagram Maker- http://www.circuit-diagram.org/
2. The RLC Circuit- University of British Columbia- http://www.math.ubc.ca/~feldman/m121/RLC.pdf
3. Mathematica Cookbook by Sal Mangano
Mathematica Notebook
https://drive.google.com/file/d/0B3mtB6CQNnpjejEzN25zbFlqajQ/edit?usp=sharing


 and
and  (and their respective primes) are the Ricati-Bessel functions chosen, and
  and
and  are constants given by wave parameters (k, etc). These scattering coefficients are then combined with a mathematical tool called a “Legendre polynomial” to give amplitude functions for the scattering. Other parameters can then be derived once these functions are modeled.