Category Archives: Holograms

designing for holograms: a revealing

While discussing this project with friends, I lost track of how many asked if I could make another Tupac hologram. I could not, due to a few problems. Confusingly, the Tupac case, so embedded in our collective cultural memory as the prime example of hologram technology, was in fact not a hologram, but rather a large-scale modern day advancement of a few centuries old stage trick,  a two-dimensional image projected onto a hidden screen, a trick that cost well over a hundred thousand dollars.

Disheartened and perplexed by this discovery, I decided to explore the technology of the holograph at a rather introductory level. With an accessible interaction occurring on a small scale, I hoped to be able to gain an understanding of the process which would better inform and encourage consideration of holographic technology on a much larger scale. On this blog site, I found a similar project, one which served as the foundation for my own exploration.

If  Tupac is not a hologram, then what is? Holography is a technique which allows for a three-dimensionally displayed image of an object through the interaction between two different light beams: exposure to monochromatic (laser) light, encoding interference patterns; and an illuminating beam, producing the image. It is often considered in relation to the photograph, of which there are many key differences, including the required apparatus, how the light of the object or scene is recorded, and the necessary lighting conditions for viewability.

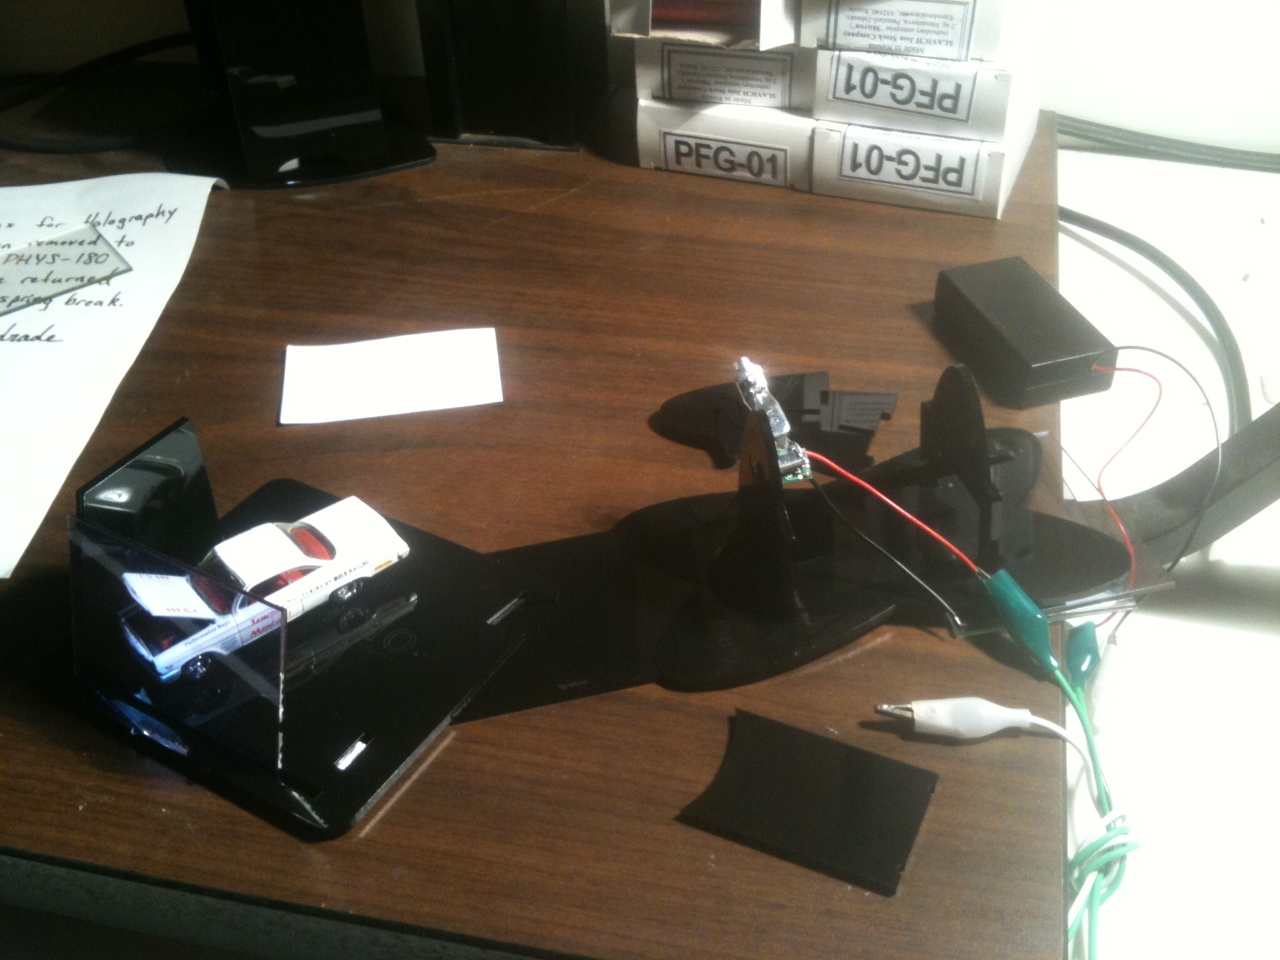
With this basic understanding, I was able to began my exploration of the technology, using the Litiholo Hologram Kit and hologram procedure sheet generously provided by the physics department.

Materials included:

  • Laser tower.
  • Laser Diode
  • Lens/ Laser Mount Assembly.
  • Spacer
  • Holographic plate holder
  • 2”x3” film plate
  • Black card
  • White card
  • Toy car
  • Lighter
  • Sturdy table
  • Timer
  • LED Blue flashlight

Procedure:

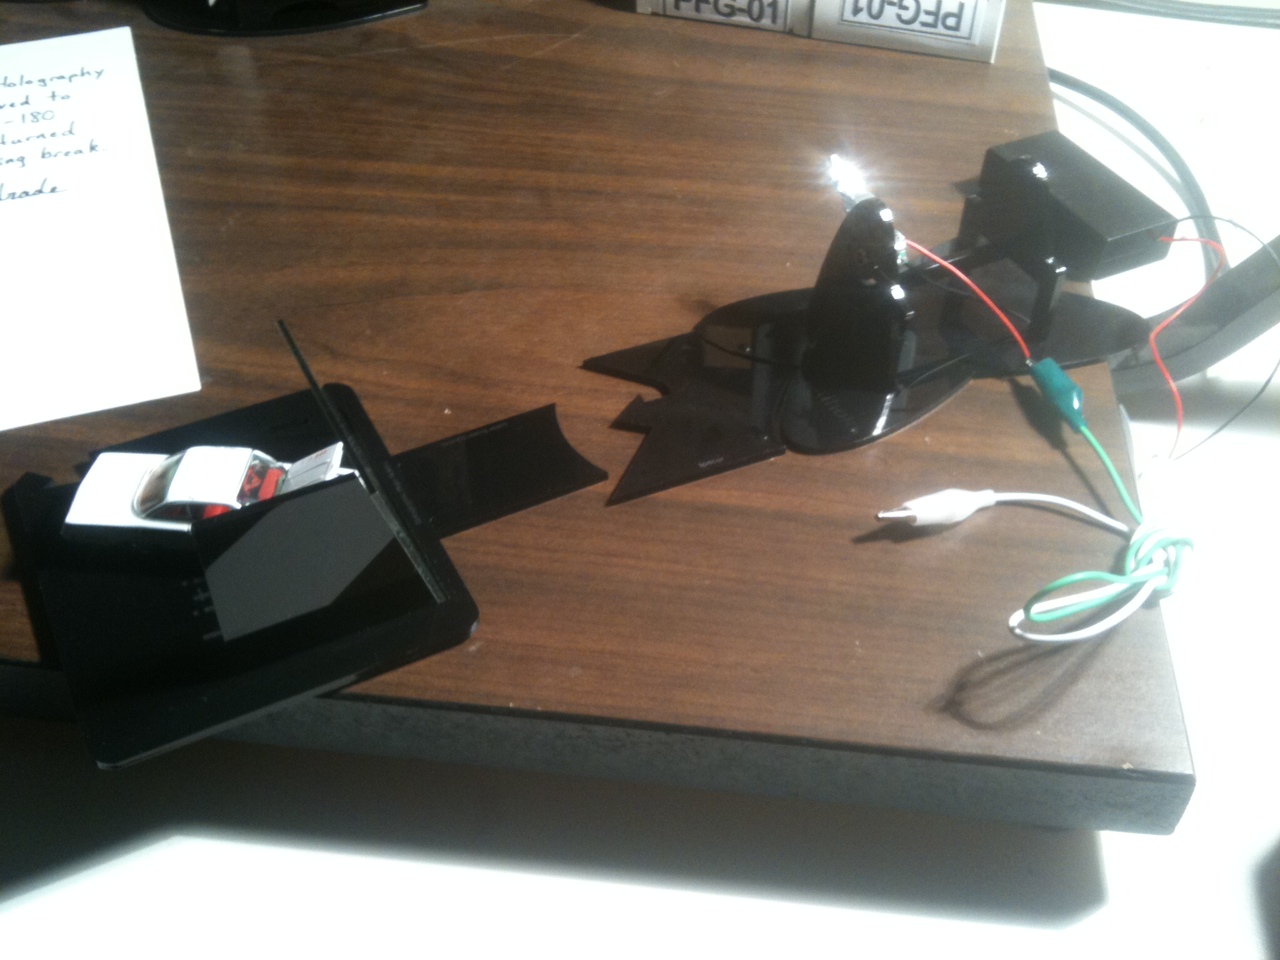
  1. Place the holographic plate holder and plate support assembly against the flat end of the laser tower spaces so that the long slot on the holographic plate holder is closest to the spacer and centered on it.
  2. Turn on the laser diode. Place the practice film plate in the long slot in the holographic plate holder, resting against the holographic plate support. The object should be placed directly behind the plate as close as possible without touching it. Using the white card, verify that the expanded laser beam is hitting the film plate, then passing through the plate to illuminate the object. Should be preset, but important to make sure of.
  3. Place the black card on the laser tower spacer so that it blocks the laser light
  4. Turn off all lights. Remove hologram film plate from the box and inner bag. Place it onto the holographic plate holder with the cover sheet faced away from the object.
  5. Wait 3-5 minutes. Total silence and stillness extremely crucial.
  6. Gently lift the black card to expose the hologram. Expose for 12 minutes. Total silence and stillness still crucial.
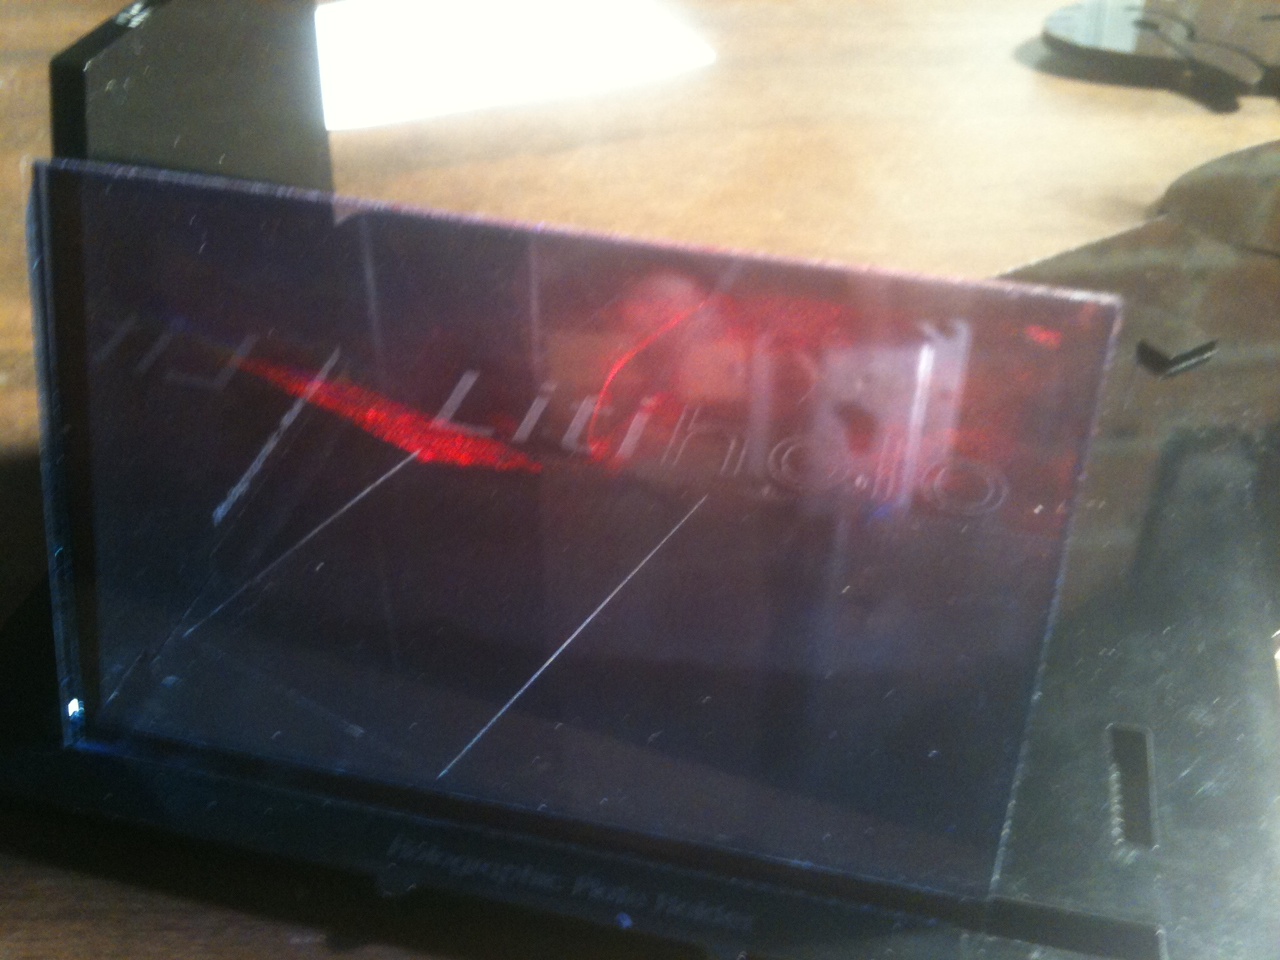
  7. Replace the black card momentarily. Remove your object. Remove black card again to view your hologram. Look through the laser tower legs to see the holographic image that appears behind the film plate. If you can see the image of your object, it is a success.
  8. To see the hologram without a laser light, use a bright light coming from the same angle as that of the laser when the hologram was made.

I followed this procedure exactly as described three times, making three different holograms (two of a small red toy car, one of an orange Bic lighter).

Initially I expected to have some difficulty when first starting to toy with the hologram kit, understanding the need for the chosen objects to be incorporated so as to produce the clearest, most impressive images. With this in mind, I prepared for small- to medium-sized objects of a rather shiny caliber. On my first day, to my surprise, the department presented an arsenal of these caliber objects at my disposal, including castles and miniature Star Wars figurines, but I ended up choosing one of the shiny red cars.  After preparation and twelve moments of total stillness, I removed the object and turned on the laser, to see a clear, red, seemingly three-dimensional image of the car that was in my hand.


I expected to have some difficulty in trying to expand my thinking to a bigger scale. In my second attempt I wanted to attempt making a hologram of  an object of my own, an object that had not already been proven to work with this kit. Due to its size and light constraints, I had to think small, and chose to use the orange bic lighter I had in my pocket. I had difficulty arranging it properly behind the film plate, and had to put the toy car behind the lighter to prop it up. In this attempt, another hologram was made, but the image was definitely not as clear as the first, due perhaps in part to the visual appearance of the object itself. As well, unintentionally and ever so-slightly, I bumped into the table during the exposure process, thus altering it. Although totally silent, my slight movements may have interfered with this attempt.

And so I tried a third time, using once more the toy car, and with what I learned from my first two attempts was capable of producing an image remarkably clearer.

Holography today and of the near future has a vast range of applications across disciplines, including art, fashion, design, government and non-government regulated security, biotechnology, and perhaps most importantly, data storage. This ubiquitous existence was certainly running through my mind throughout this project, but due to the constraints of the kit in its smallness and touchiness, and my own inexperience, was not able to apply it directly to any of these disciplines.

If I had six more weeks to do this project, or if I had to do it all over again, I would have explored further the holographic ability of a vaster range of objects. Were I to use the exact same kit, the size constraints would certainly still exist and limit my exploration. In that scenario, then, I would perhaps find it fruitful to intentionally alter with the exposure process in a way which would allow me to manipulate the holographic image into a more distorted one. While not with immediate scientific value, I believe studying human perception and response to these distorted, three-dimensionally displayed images would prove profoundly insightful. For instance, what happens to the image when I am not totally silent, and how do different levels of noise-making affect the holography process? In other words, I would like to compare the environmental stimuli which afford the making of the holographic image as they relate the multisensory experience of human’s witnessing these images.

With access to more advanced holographic technologies, I would like to delve more explicitly into the aforementioned disciplines in which they are becoming increasingly involved, namely as it relates to data storage and design. The logo on a bank credit card is often a hologram, storing personal, computer-generated data. Frustratingly, most of the public are not aware of the ways in which holograms have already begun to invade their daily lives. In a larger scale project, with higher-end technologies, I would hope to bring awareness of the hologram’s existence in our daily lives, through the design and installation of images(either holographic or referring to the holographic) into the public spaces many of us often inhabit.  

Group 7 Results and Procedure

Roger Rothenberg
holograms

Using the LitiHolo Holography Kit (http://www.litiholo.com/hologram_kits.htm), I created transmission holograms and attempted to create a reflection hologram.

Transmission Hologram Procedure:
In the dark room, I assembled the LitiHolo kit as instructed (see image 1), with the object to be rendered in the delineated box on the black plastic base (with rubber foundation to reduce vibration). I turned on the laser, turned off all other light in the darkroom (save for a blue darkroom LED [the LED’s blue wavelength, while illuminating the room enough for me to get around, did not affect the hologram, which was produced by red light]), and used white paper to ensure that the laser spread to the whole surface of the spot I would place the photosensitive glass. I used a black cardboard “shutter” to block the laser’s path to the object so that I could position the photo glass without exposure. After waiting one minute for the setup to settle (LitiHolo instructions recommend three minutes for a clearer hologram), I removed the shutter. After waiting approximately five minutes (as recommended by LitiHolo), I removed the object and made sure the hologram had been recorded. At this point it was safe to turn the light back on, as the hologram was finished and would not be exposed further. See image 3 for an example transmission hologram.

Reflection Hologram Procedure:
There were no instructions on creating a reflection hologram from the LitiHolo kit, but I attempted to create my own setup (see image 2) based on more detailed procedures for reflection holograms. Other sets of instructions recommended a greater distance between laser and recording glass, so I increased the spacing between the laser mount and object base provided by LitiHolo. I rotated the base so that the slot for the photo glass was between laser and object. From this point, I proceeded as I did with the transmission hologram. After getting some unremarkable results, I tried again, this time with an additional non-photo glass placed behind the object, with the rationale that this might increase the amount of light scattered from the object onto the photo glass. This did produce a more visible reflection hologram.

Though the above procedures did result in visible holograms, several factors might have improved their quality:

  • Decreasing ambient vibrations would have made for a sharper, more precise holographic image. While this might be difficult in the school’s darkroom, some kind of shock-absorbing foundation beneath the setup (such as sand) might help
  • Further fine-tuning of the laser’s path of illumination would have made for more centered holograms. Many of those I created had blank space below or around the hologram, indicating unused parts of the photo glass
  • Additional mirrors may have allowed for a more controlled setup of the direction of the interfering beams. LitiHolo did not provide additional mirrors
  • A more powerful laser might have allowed for a decreased exposure time, which in turn would create a shorter window for vibrations to disrupt the image


Image 1: Transmission Hologram Setup

Image 2: Reflection Hologram Setup


Image 3: Example Transmission Hologram of Car Figurine With Hood Open

Creating a Reflection Hologram

Creating a Reflection Hologram


Materials:

  • Helium-Neon Laser
  • Small mirror mounted on block of wood
  • Lens mounted on PVC Pipe
  • Holographic Plate and Developing Kit
  • Lightproof box (Holographic plate should be inside)
  • Sandbox
  • Shutter (can simply use cardboard stock)
  • 4 Inner tubes
  • Sturdy Table
  • A small object

Setup:

  1. Lay the inner tubes on the table so they will align with the corners of the sandbox
  2. Place the sandbox on top of the inner tubes. Doing this will reduce the amount of vibrations within the sandbox.
  3. Place the He-Ne laser inside the sandbox, preferably near a corner and aiming parallel to the long side of the sandbox. You may want to dig it into the sand a bit to reduce possible vibrations or movement of the laser.
  4. Take the lens mounted on the PVC Pipe and dig it into the sand about six inches away from the laser. The laser should be going straight through the middle of the lens. Also make sure the lens is aligned properly as to spread out the laser light.
  5. Place the mirror mounted on wood about six inches past the lens. The mirror should be located in the middle of the spread out laser beam. Turn the mirror 30 to 45 degrees away from the incoming light.
  6. Take the small object and lay it in the sand about two feet away from the reflected laser light. Make sure the object is secure enough to stand while the holographic plate is leaning on it. If not, you may have to build a tiny stand to hold your holographic plate at the corners.

Procedure:

  1. Turn on the laser and make sure the setup is done correctly. The laser light should be covering the entire object you wish to turn into a hologram.
  2. Place a piece of cardboard stock in front of the laser; this will act as a shutter. Make sure there is no laser light leaking out the sides of the shutter.
  3. Turn off all lights in the room. Any light leakage could ruin the holographic image.
  4. Take the holographic plate (should not have been exposed to light yet) and lean it against the object you wish to create an image of. The emulsion of the holographic plate should be facing the object. The face of the plate should be slightly more than perpendicular to the laser light.
  5. Sit still and keep quiet for around 5 minutes to let the vibrations in the room and sandbox to settle. Light waves are very small and the slightest vibration could alter the image and distort the final product.
  6. Carefully but quickly remove the shutter from the laser for about fifteen seconds. Place the shutter back.
  7. Remove the holographic plate from the sandbox and place it back inside the lightproof box.
  8. Take the Holographic plate to the darkroom where you plan to develop it.
  9. Follow the instructions from the Developing kit. Instructions are generally:
    1. Mix chemicals with distilled water to form developing solution and bleach
    2. Dip and jiggle the plate in developer for around 20 seconds
    3. Rinse in water for 30 seconds
    4. Dip and jiggle the plate in bleach for around 20 seconds
    5. Rinse in water for 30 seconds
    6. Dry vertically using a hair dryer (avoid using high heat)

HOLOGRAMS: History and Usage

Please View Presentation at: http://prezi.com/ou3ojjwurovl/holograms/

Data: To be viewed in person through a self-constructed hologram.

In physics terminology the hologram is defined as such: “a hologram is a record of the interaction of two mutually coherent light beams, in the form of a microscopic pattern of interference fringes.” To the casual observer this would appear to be an overly complex definition of what appears to us as three-dimensional photograph, however, there fortunately is a middle ground to be found. In the most basic terms, a hologram is an imprinted two-dimensional image that has been exposed to monochromatic light and when properly illuminated in a collimated beam of monochromatic light produces a three-dimensional image. Though holography is often associated with its predecessor, the photograph, their only real similarity is the use of photographic film, for while photography can be described in terms of Euclidean geometry, the hologram relies on the principles of diffraction and interference, which are properties of waves and must be defined through them.

The concept of interference is perhaps best illustrated by the disruption of radio waves in areas with extremely tall buildings. While passing through such an area the receiver in a standard radio receives not one, but two distinct signals: one from the original transmitter and they other from the reflection of that transmission from the buildings. A certainly points the waves are in phase with each other, producing an extremely amplified signal. At other points the waves are out of phase, troughs occurring in one, while the other is at a crest, producing silence as the waves cancel one another out.

The first true hologram was produced in 1948 by Denis Gabor using primarily the concept of interference. Using a transparent lens with a series of opaque lines, he focused a beam of monochromatic light parallel to the lens. The interference that occurred between the beam and the light scattered by the lines was imprinted on a film. Unlike stereoscopic photography, which deceives the human eye by capturing only two portions of the wavefront (locus of all points in a light beam that are in the same phase), producing an illusion of depth that can be discovered by simply changing ones viewing position, Gabor’s film now contained all the information about the wavefront of the object. He now needed only to develop the film just as one would a negative and pass the same collimated beam through it again producing two waves of the same magnitude but opposite signs. One was the reconstructed image of the object from the original scattered wave and the other the conjugate image that appeared on the opposite side of the hologram. However the quality of the image was poor, as the conjugate image and scattered light from the direct beam made viewing the reconstruction difficult. It should also be noted that the image was two-dimensional rather than three-dimensional.

Diffraction is simply the characteristic of light to spread out in a defined matter when passed through a narrow grating. The cosine grating is the most basic from of such narrowing; when a laser beam is passed through it, three beams emerge. Diffraction became useful in the creation of holograms once monochromatic laser light was developed, allowing for the creation of the modern hologram.

The modern hologram is produced in largely the same way as Gabor’s original, however, with some important differences. First the object was three-dimensional, and was placed in a glass cylinder with holographic film taped around the inside. The object is then exposed to concentrated laser light diffracted first through a microscopic objective lens. The object is directly impacted by the central portions of the laser light and the film is impacted by the outer portions of the laser diffraction. The object is then removed and the developed film placed in its original position. When the film is re-exposed to only the portions of laser that directly struck the film a three-dimensional image appears. As laser light is far less chaotic than previous light sources, the image also appears far clearer. Advancements in hologram technology have continued beyond this, allowing for greater variation in color and sharper images, however, the basic procedures have largely remained the same since the advent of proper lighting instruments.

When holograms first appeared in popular imagery during the 1970s the technology instantly seemed to be the stuff “sci-fi” dreams were made of. Popularized through cameos in films like Star Wars and TV shows like Star Trek, holograms fit in perfectly with a techno-romantic vision of the future.

While these fictionalized depictions of the technology remain a mainstay of modern technological lore, the usage of holograms has become quite practical in a contemporary context. Holograms are an important part of daily life. Perhaps the most utilitarian use of the hologram is its government-sanctioned usage. Holographic technology has become an important enforcer of international and domestic tax and tariff laws. Products like alcohol and cigarettes, which have a wide presence on the black market, are subject to duties that must be paid before they are placed on the shelves of legitimate retailers.  Holograms are used to ensure that those fees are paid. Individualized holograms (see Prezi à “Government/Security”) are affixed to products of good legal standing. These holograms are difficult to fake and ensure the collection of important governmental revenue. Likewise, similar holograms are attached to driver’s licenses and credit cards to prevent fraud and to ensure legal compliance. American credit firms Visa and MasterCard began their use of holograms with the now famous “Dove Hologram” in 1984. Governments too began placing holograms on identification cards and paper currency in the early 1990s. In this same manner holographic images can also be seen on concert tickets, phone cards, and on consumer products to confer legitimacy.

While security issues are implicit in much of the hologram’s usage the beauty of this technology and the images it can produce are not ignored by artists, advertisers, musicians, and designers. Companies that solicit the use of holograms on their products continually see a spike in sales. The colorful complexity of these fabricated images are eye-catching and visually enticing to consumers. Though holograms are easy enough to create, their presence on products increases the consumer’s perception of value allowing for an increase in both price and prestige. Such is the case in the fashion world. Designer Alexander McQueen’s Fall 2006 line featured a stunning life-size replica of supermodel Kate Moss in a hologram. (See Prezi à Fashion). These capabilities of holographic technology are not new, but the dazzling effect of this artistic usage helped McQueen earn his reputation as a “cutting edge” and “avant garde” designer.

It is not far off to envision a world covered in holographic imagery. American sports retailer Nike Inc. has initiated a large ad campaign of holograms in many of its retail stores. Moreover, Pierre Huyghe’s usage of superimposed holographic imagery in his video-art piece “One Million Kingdoms” helped earn the artist, and his fictionalized character “Ann Lee”, international notoriety in museums across the globe. (See Prezi à Art).  Bavarian Motor Works (BMW) employed kinetic hologram technology to help perfect the aerodynamics of the 5-series exterior body. This process has been converted to a museum installation for a permanent exhibit at the BMW Museum in Munich, Germany. Similarly, in 2006 Zebra Imaging out of Houston, Texas revealed its composite for holographic architectural modeling. The company creates holographic models of architectural designs that save space and cut down on the environmental materials required to create layered mock-ups. In almost all segments of the design field, creative professionals are utilizing holograms for their visual appeal and impressive ability to communicate large amounts of information.

Beyond their aesthetic value, holograms are also helping to save lives. The digitization of X-ray technology has allowed doctors and other medical personnel to create three-dimensional holographic images of X-Rays, CAT Scans, and other medical imaging.  This type of imaging allows physicians to view life-size depictions of the human body, eliminating the need for many surgeries and improving the accuracy of diagnosis. It is safe to say that holograms have come a long way since Princess Leia famously claimed, through a hologram no less, that Obi Wan Kenobi was her and her world’s only hope.

A Look Into the Structure and Creation of Holograms

A Famous Hologram

From our ID’s and credit cards to old software packaging, holograms are seen everywhere in our day to day lives. Though these little three dimensional images are everywhere, the average American does not understand how they are made. Our group will investigate the structural design of holograms and how implemented with lasers can create three dimensional images. We will use the holography kit to build our own holograms and through their construction get a better understanding of how they work.

Welcome!

This is the Student Project Group for Conor Dunn, James Eischen, and Bryan English. This is the section of the LTT website where you should place all of your posts that relate to your group project. Once you have read the “How To Post” page and have decided upon a physics project for your group, you should follow along with the assignments listed in the Course Syllabus to know what should be posted here, and when. Remember that any comments on others’ work should not appear in this category, but should be made as comments underneath their respective posts. As soon as you finalize your project plans, keep up with the assignment due dates on Moodle, and have fun posting. Good luck!

Getting Started…

In order for you all to start blogging both independently and collaboratively, you will first need to review the guidelines for the required format of your posts and how your blog work will be assessed. To do this, look at the page titled “How To Post.” The tab for this page is listed in the bar above.