Toolkit for the next normal; Resources for building community and equity in your classroom

Over the past year I attended several remote conferences, (EDUCAUSE Learning Initiative (ELI), Innovate Transformed (Ohio State University), and the College Art Association (CAA) annual conference. As you might imagine, remote/hybrid teaching and learning along with issues of equity and inclusion were at the center of discussion.  In this post I have tried to compile some of the key conference takeaways and other resources that you may find useful as we look forward to in-person learning in the fall. I’ve sorted these into sections for you: Pandemic Findings, Equity, Inclusion and Universal Design, Land Acknowledgement Resources, Tool and Tutorials, Vassar Teaching and Learning Resources and Funding. 

Designing for flexibility (multi-modal options for student participation, including mobile) is a key justice and equity issue.
– John Muir (conference attendee) 

Pandemic Findings

Educause Survey Results: Student Experiences Learning with Technology in the Pandemic                                                                                                            Christopher Brooks, Ph.D. Director of Research, Survey dates 10/4-12/14/2020 Total sample: 9,499 students, 58 institutions, US sample: 8,392 students, 54 institutions
Link to full report: https://tinyurl.com/2021StudentStudy 

5 Key Findings

  • Pandemic learning happened everywhere and whenever. Learning environment appears to have played less of a role in determining students’ evaluation of their learning experiences than did course modality. Full-time students favored synchronous online courses. Married students, students living off-campus, and students who are working full-time preferred online asynchronous courses.
  • Keep calm and embrace technology. Students reported that their instructors communicated effectively and demonstrated a reasoned and reasonable approach to technology use in their courses.
  • Significant learning experiences start with opportunities for student and instructor interaction. Synchronous courses tended to be rated as better organized with greater opportunities for student–instructor and student–student interaction.
  • The best technology experiences students had during the first semester of the pandemic were related to the use of the LMS, videoconferencing applications, and recorded lectures and access to specialized software. Regarding recorded lectures, the ability to review lecture materials whenever, wherever, and for however long respondents might need was seen as the major benefit of such recordings.
  • Students’ worst technology experiences varied considerably but generally fall into one of three very broad categories: (1) explicit technology issues, (2) attempts to use technology that failed, and (3) poor pedagogical choices and course management practices.

Equity and Inclusion and Universal Design

Image titled "Reality" depicting 3 people trying to look over a fence. One person stands on several boxes and is taller than the fence. Next person stands on one box and can just see over the fence. The third figure stands in a whole and cannot see over the fence. Illustration depicting the difference between Equality and Equity. Three figures of different heights and abilities are given the same box to stand on is labeled Equality. Three figures given the boxes to stand on that are the right size for them is labeled Equity.
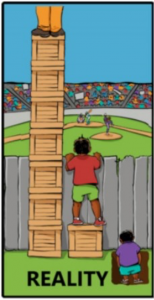
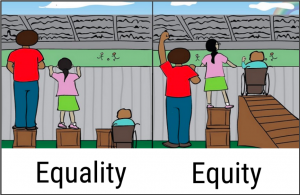
Interaction Institution for Social Change. Artist: Angus Maguire

Equity Unbound
https://unboundeq.creativitycourse.org/
Equity Unbound is an emergent, collaborative curriculum which aims to create equity-focusedopenconnected, intercultural learning experiences across classes, countries and contexts.  Equity Unbound is for learners and/or educators at all levels (e.g. undergraduate, postgraduate, professional development) who are interested in exploring digital literacies with an equity and intercultural learning focus, in an open and connected learning environment.
Virtually Connecting – YouTube channel
https://www.youtube.com/c/VirtuallyConnectingChannel/videos
The purpose of Virtually Connecting is to enliven virtual participation in academic conferences, widening access to a fuller conference experience for those who cannot be physically present at conferences.

Equity Unbound
Equity Unbound has teamed up with OneHE to develop some open educational resources for online community-building
https://onehe.org/equity-unbound/
Community-Building Resources from OneHE & Equity Unbound

Inclusive Stock images

Nappy
Beautiful photos of Black and Brown people, for free. For commercial and personal use. https://nappy.co/
Disabled And Here Collection
This stock library is a disability-led effort to provide free and inclusive images from our own perspective, with photos and illustrations celebrating disabled Black, Indigenous, people of color (BIPOC). https://affecttheverb.com/collection/

Harvard Implicit Bias Test
https://implicit.harvard.edu/implicit/
Project Implicit is a non-profit organization and international collaboration between researchers who are interested in implicit social cognition – thoughts and feelings outside of conscious awareness and control. The goal of the organization is to educate the public about hidden biases and to provide a “virtual laboratory” for collecting data on the Internet.

Zoom Pros and Cons– Should you require your students to turn off their camera? Pros, Cons and Advice from Oregon State University’s Center for Teaching and Learning
https://oregonstate.app.box.com/s/j6vcszazsgaq3ikyqkcxc4s51pueb53h

Collaborative Learning Techniques – Quick Reference
Think-pair-share, talking chips, role play and more. 
https://library.gwu.edu/sites/default/files/tlc/CoLT%20Quick%20Reference%20%281%29.pdf

On Grief & Loss: Building a Post-Pandemic Future for Higher Ed without Losing Sight of Our Students and Ourselves – Joshua Eyler Keynote:
Open CoLab Live

Land Acknowledgement  Resources

Native Land – Native-Land.ca is a website run by the nonprofit organization Native Land Digital. We are guided by a Board of Directors and an Advisory Council. Our funding comes from friendly organizations and individual donors. https://native-land.ca/

Native Governance Center
Native Governance Center is a Native-led nonprofit organization that serves Native nations in Mni Sota Makoce, North Dakota, and South Dakota. We support Native leaders as they work to rebuild their nations through our leadership development and Tribal governance support programs. We believe that strengthening governance is a direct pathway toward improving quality of life for Native people. https://nativegov.org/a-guide-to-indigenous-land-acknowledgment/

Universal Design

Pedagogies of CarePedagogies of Care: Open Resources for Student-Centered & Adaptive Strategies in the New Higher-Ed Landscape offers practical and engaging advice about what “next” should look like across higher education, from sixteen current and forthcoming authors in the Teaching and Learning in Higher Education book series from West Virginia University Press.

Why Universal Design for Learning is Essential to Higher Education’s “New Normal”
Thomas J. Tobin, State College PA, 2 May 2020

Tools and Tutorials

Discord (download app) is a voice, video and text communication service used by over a hundred million people. 
Discord offers:

  • A dedicated, free to use, invite only class space for classes 
  • Text channels to organize things like lessons, homework, or study groups so students can go over the latest assignments together
  • Voice channels for both one-to-one and group discussions, or even office hours
  • A real-time teaching environment where lessons can be shared with up to 50 people at a time

 Check out Chad Fust’s Techademia post to Get started.

Discord Server Templates will let you clone existing categories, channels, roles, and permissions to help you create a new server easily!
Discord template for Studio Art 
Discord Template Library

Join Vassar’s Discord User Group. Email Amy Laughlin (amlaughlin@vassar.edu), Chad Fust (chfust@vassar.edu), or Karly Andreassen (kandreassen@vassar.edu). 

Vassar Teaching and Learning Resources

    • Vassar Together Teaching and Learning
    • Vassar Moodle – Faculty Resources and Training 
    • Vassar Spaces- Vassar College provides students, faculty, and staff with the opportunity to register a domain name and create a digital presence through various mediums such as blogs, portfolios, and wikis. You can easily install open source applications such as WordPress, MediaWiki, Drupal, Scalar, and Omeka to your own domain, and use this space to create your digital identity and express your creativity.
    • LinkedIn Learning Provided by Vassar College at no charge to Vassar students, faculty, and staff, the LinkedIn Learning library offers access to more than 1,000 self-paced training courses. Get comprehensive training in audio, video, photography, graphic design, web design, business, and development from expert instructors, 24/7.
    • Equipment Checkout – SLR and Video Cameras/Audio/Lighting. Email Media Resources or Academic Computing Services.
      Media Resources – Lower Level of College Center 
      mediaresources@vassar.edu, (845) 437-7479                                                     Academic Computing Services – acs@vassar.edu
    • Vassar Innovation Lab – Chad Fust, manager, chfust@vassar.edu
      Amy Laughlin, director, amlaughlin@vassar.edu
    • Techademia (ACS Blog)
    • Vassar Engaged Pluralism Initiative (EPI)
    • Vassar College Anti-Racism, Equity, and Justice – Connecting with each other to dismantle, disrupt, and destroy racism, inequity, and injustice in our community

Funding 

Putnam Summer Fellowship for Teaching with Technology 
Frances D. Fergusson Faculty Technology Exploration Fund

Need help?  Email you ACS liaison or acs@vassar.edu

Share

Resources for Teaching Studio Courses Online

In this post I’ve gathered some tutorial videos and slideshows from Art Prof along with some links to using Discord in your classes. What is Discord? Check out Chad’s post, Using Discord for Teaching, Learning, and Community.  I’ve also included a handy tool for displaying images during in-person class discussions, critiques, or virtual meetings. 

Art Prof is a global online community of visual artists that cares deeply about art, learning, and sharing. We provide equal access to art education on a global scale, removing barriers that exist due to the cost of higher education, private classes, and online classes with paywalls. 

 Art Prof Clara Lieu, talks about her experiences using Discord to teach art courses online. 

Discord  (download the app)

Discord Server Templates will let you clone existing categories, channels, roles, and permissions to help you create a new server easily!
Discord template for Studio Art 
Discord Template Library

Reference Slideshows

Best Practices 
Discord for Classes
Get to Know Students
Video Layouts with OBS
Set up & Equipment
Photographing Artwork 

Stock images for drawing and painting 
ART Reference Photos

Quick Space Bar Image Viewing Tip for Mac OS – Helpful tool for sharing images in class or during virtual meetings. 

  1. On your Mac, select one or more items, then press the Space bar.
    A Quick Look window opens. If you selected multiple items, the first item is shown.
  2. In the Quick Look window, do any of the following:
    • Resize the window: Drag the corners of the window. Or click the Full Screen button  in the top-left corner of the Quick Look window. To exit full screen, move the pointer to the bottom of the window, then click the Exit Full Screen button  that appears.
    • Zoom in and out of an item: Press Command-Plus (+) to make the image bigger or Command-Minus (–) to make it smaller.
    • Rotate an item: Click the Rotate Left  button or press and hold the Option key, then click the Rotate Right  button. Keep clicking to continue rotating the item.
    • Mark up an item: Click the Markup button 
    • Trim an audio or video item: Click the Trim button then drag the yellow handles in the trimming bar. To test your changes, click Play. To start over, click Revert. When you’re ready to save your changes, click Done, then choose to replace the original file or create a new one.
    • Browse items (if you selected multiple items): Click the arrows near the top-left of the window or press the Left Arrow or Right Arrow key. In full screen, click the Play button  to view the items as a slideshow.
    • Show items in a grid (if you selected multiple items): Click the Index Sheet button  or press Command-Return.
    • Open an item: Click Open with [App].
    • Share an item: Click the Share button then choose how you want to share the item.
  3. When you’re done, press the Space bar or click the Close button  to close the Quick Look window.

Short Demo Video:


Share

3D Modeling a Thirteenth-Century Dove

The Eucharistic Dove, one of only a few left in existence, is found behind glass in the Frances Lehman Loeb Art Center, making it a difficult piece to investigate closely. Academic Computing Services students, Dylan MacDonald, Zechariah Lee, and Sufyan Abbasi, under the guidance of Amy Laughlin and Professor Andrew Tallon, were put to the task of producing a 3D model that preserves the texture of the Dove for closer inspection.

The model was produced using a technique called photogrammetry, which is the process of stitching together a 3D model based on a sequence of images. The technique combines novel application of computer vision with classical projection mapping that produces stunning results. The software used was Agisoft Photoscan, an industry standard photogrammetry software that allows users to stitch together an orbit of still photos into a 3D model, like so:

As a proof of concept, we began with trying to model a candlestick, donated to us by Professor Tallon, which had similar properties as the Eucharistic Dove in size and luster. Due to the reflective surface of the candlestick, we found that using a green screen was out of the question since the shades of green were reflecting off of the object and projected onto the model. After trying different techniques, we discovered that shooting with a white background in the Loeb photo studio proved to be the best way to eliminate any unwanted reflections in our model.

Once we took photos of all angles of the Dove (over 200 pictures total), we used Adobe Photoshop to mask out the backgrounds and loaded the images into Photoscan. There, a second masking process was done to tell the software the bounds of the object to be generated.

Once Photoscan was finished processing the files, we were left with a .obj file that formed the 3D model of the Dove, a .tif file that dictated the texture, (shown below) and a .mta file that maps the texture to the 3D model.

Next, we loaded the model into Blender, an open source 3D modeling software. Here, we made edits to the generated 3D model, such as filling in the bottom area of the Dove where photos were not available.

Finally, the model was ready to be published on SketchFab, an online publishing platform for 3D models, which allows users to manipulate the model in 3D space and view the model in virtual reality. 

From start to end, the process took about a semester for the initial research and testing, and half a semester for photographing the Dove and making edits to the model. Dylan and Zech worked on masking the Dove in Photoshop and Photoscan and generating the 3D model in Photoscan, and Sufyan worked with Blender to make the edits to the model.

Eucharistic Dove by Vassar College on Sketchfab

We hope that you enjoy the Dove as much as we enjoyed producing the model. If you have a project idea involving 3D modeling and need some help,  please contact Amy Laughlin in Academic Computing Services in CIS.


Share

ACS Collaborates with ART 386 students and faculty on “first-of-its-kind exhibition.”

Amitabha Buddha, Central Tibet, 19th century; pigment on cloth; 38 1/2 x 25 1/2 in.; The Rubin Museum of Art, New York, F1997.6.3.

Amitabha Buddha, Central Tibet, 19th century; pigment on cloth; 38 1/2 x 25 1/2 in.; The Rubin Museum of Art, New York, F1997.6.3.

ART 386,  Embodying Compassion in Buddhist Art: A Curatorial Training Seminar was taught by Karen Lucic during Fall semester, 2014. The purpose of the class was to give students the opportunity to research and curate an exhibition at the Frances Lehman Loeb Art Center. During the summer of 2014, Professor Lucic contacted me to discuss creating a website for her students to use as a repository for their research and eventually this site would become a companion site to the final exhibition in April, 2015. Over the course of the Fall semester, students wrote and compiled content for the site and they worked closely with ACS to design and populate the site.

From ART 386 Syllabus:

Each student will be responsible for the digital content and interpretation of 2-3 works in the exhibition. The instructor will assign the objects to each student, based on her/his experience and preparation. These student contributions will be posted on the exhibition application and/or website. (60% of grade.)

Students will work in teams to produce additional resources for the exhibition: gallery guide, interactive maps, guide to web resources, etc. Students in the team will also give feedback on other team members’ work before submission (20% of grade.)

From ART 386 Assignment Sheet:

The purpose of this assignment is to create digital educational content for the exhibition. Always remember who your audience is: visitors to the exhibition, or online users, who might not know much—or anything—about the topic. What you write, and your choice of materials should be based on your assessment of what will enhance their experience and understanding of the exhibition. Texts should be concise and to the point. Other materials should be short but engaging.

For each work you have been assigned:

1) Write an interpretative text (no more than 100 words) for app/website

2) Select one comparative image (must be open access and high resolution); include full caption of comparative image

3) Write a text (no more than 100 words) explaining the comparison

4) Select an audio file, if possible, that enhances the work (no more than two minutes). Examples: chanting, singing, mantra recitation, etc.

5) Select a video file, if possible, that enhances understanding of the work (no more than 2 minutes). Examples: practitioners circumambulating, prostrating, spinning prayer wheels, making sand mandalas, offering incense, etc.

6) If there are no appropriate audio or video files, choose another comparative image.

7) Compile a list of unfamiliar terms from your texts, with definitions

8) Map your work, at least by country. With some works (Putuoshan, Nachi, etc.), it may be possible to be more precise about locations.

9) Record your written contributions.

While students were working to create the content for the site, ACS student employee Bryce Daniel worked on building a wireframe for the WordPress site. Professor Lucic also collaborated with Duke University students to design an App for the exhibition. The App hosted audio files recored and edited by ACS Consultant, Baynard Bailey. These recordings, narrated by both students and Professor Lucic, include short commentaries describing individual pieces in the exhibit, as well as a pronunciation guide for a glossary of terms.

The Embodying Compassion WordPress site is a comprehensive online exhibit reference guide, containing audio, video, images, interactive hotspot maps, and extensive research, curated by ART 386 students. This project proved to be a excellent example of how students, faculty, and ACS consultants collaborate to produce educational materials for the classroom and public audience.


Links:

Embodying Compassion Website

The Frances Lehman Loeb Art  Center: Embodying Compassion is a first-of-its-kind exhibition celebrating one of the most important figures in Buddhist art, April 23-June 28, 2015

Get the App


Share

Add Panning Motion to Keynote Presentations, and Annotate Screenshots

Keynote provides many tools for animating content of your slide presentation. One easy and very useful movement uses the Magic Move transition.  This tool allows a panning movement across a large image. For example, if you wanted to show the entire length of a webpage or a large photograph, you could use the Magic Move transition to move across the page. This will work with any object that is in one position in the first slide and is in a new position in the following slide. For this this example, I captured a screenshot of an entire webpage that would require scrolling down in order to view all the content. In the first slide, the image is positioned on the slide so that the top of the webpage is visible. In the following slide, the image is positioned so that the bottom of the webpage is visible. Using the Magic Move transition, Keynote will create the panning movement between the two slides.

This is what it would look like:


Steps:
Import image into Keynote slide by dragging and dropping it onto a blank slide.
Screen Shot 2014-12-10 at 3.39.56 PM

Duplicate the slide. To duplicate a slide in Keynote, right-click on the slide you wish to copy, or select Duplicate Slide from the Edit Menu.

Screen Shot 2014-12-10 at 3.40.41 PM

On the new (duplicate) slide position the image so that the bottom portion is visible.

Open the Slide Inspector window.

Click on the slide inspector icon then choose the transition tab.

Under the Effect dropdown menu, choose Magic Move.

screen shot edit pm2

Screen Shot 2014-12-10 at 3.54.43 PM

At the bottom of the inspector menu you will have the option for the transition to start automatically or “on click.”

You will also be able to choose the speed of the transition and whether or not to insert a delay before the start of the effect.

Screen Shot 2014-12-10 at 5.06.08 PM

Tip for Annotating Screenshots:
For this example, I used a free application called Awesome Screenshot.”
It is available for Chrome and Firefox browsers, and it allows you to capture an entire webpage, or any portion of a page. It also provides tools for annotating screenshots.

http://awesomescreenshot.com

Here’s a quick tutorial:


Share

Publishing a Google Presentation in Moodle

by Amy Laughlin

Upload a PowerPoint or Keynote slideshow to Google drive and embed it in your Moodle site, and any changes you make to your presentation will be immediately reflected on your Moodle site. Your students will be able to view the presentation directly from within Moodle.

Click the upload arrow in your Google Drive and then choose Files

Upload-Files

Make sure conversion is turned on:

Upload-Settings-Convert

Once your presentation is uploaded, open it in your Google drive and click File > Publish to the Web.

File-Publish-to-the-Web

Then choose > Start publishing

Publish-to-the-Web

You will then see a dialog box that allows you to choose the size of your presentation and whether to Link or Embed. Choose the Embed tab, and copy the iframe source code.

Screen Shot 2014-10-20 at 2.33.16 PM

Now return to your Moodle site, turn editing on, and click on > Add an activity or resource.

Screen Shot 2014-10-20 at 2.41.48 PM

Choose > Add Page

Screen Shot 2014-10-20 at 2.42.28 PM

Add the name and description of your presentation. Make sure the toolbar toggle is turned on to reveal all the toolbar options. The toolbar toggle button is the first button in the upper left corner of the toolbar.

Screen Shot 2014-10-20 at 2.44.03 PM

Scroll down to the Content section (below the page description).

Screen Shot 2014-10-20 at 2.56.52 PM

Click on the edit HTML source button (<>).

Screen Shot 2014-10-20 at 2.44.15 PM

Paste in the Embed code that you copied from the Google Presentation Publishing page, then choose Update, to save.

Screen Shot 2014-10-20 at 3.04.04 PM

Click either the “Save and Return to Course” or “Save and Display” button at the bottom of the screen.

Your Google Presentation is now live and published to your Moodle site. You can edit and update your slideshow from your Google Drive and your changes will automatically be reflected in your Moodle site. Note that you may need to refresh your browser page in order to see the slideshow.

From your course page in Moodle, your presentation will appear like this:

Screen Shot 2014-10-20 at 3.12.14 PM

When your students click on the presentation file, a new Moodle screen will open displaying the slideshow:

Screen Shot 2014-10-20 at 3.12.35 PM

You may also embed your presentation as a Label instead of a Page in Moodle. When adding and Activity or Resource, choose Label instead of Page (all other steps remain the same), and your slideshow will be immediately visible from a section on your course page.

Screen Shot 2014-10-20 at 3.13.15 PM

 Works with video too.

If you want to embed video that is stored on your Google Drive you can copy the iframe code from the Google Drive Viewer. This is a great option if your video is not posted on YouTube or Vimeo.

Screen Shot 2014-10-21 at 12.42.30 PM

After uploading your video to Google Drive, select it and choose Open with > Google Drive Viewer, from the More drop-down menu. Once the video is open in Google Drive Viewer, click on the three vertical dots on the top menu, then choose Embed item.

Screen Shot 2014-10-21 at 12.33.09 PM


This screen will appear:

Screen Shot 2014-10-21 at 12.33.43 PM

Copy the embed code into a page or label using the HTML editor button in your Moodle site, following the same procedure as described above, to embed a slideshow presentation.

The resulting video will look like this in you Moodle site:

Screen Shot 2014-10-21 at 12.31.48 PM

If you embed the video into a Moodle page then you will see the page icon. When clicked, it will open a separate window for viewing the video. If you embed the iframe code into a Moodle label you will see the video embedded in your course front page.


Share

Creating Interactive PDFs using Adobe InDesign

IndesignScreenShot

Using InDesign to create interactive PDFs

The term “interactive PDF” refers to a PDF file designed to be viewed on screen. Interactive PDF features are the parts of a PDF that provide your audience with additional functions that are more commonly found in websites. Some of these features include buttons, hyperlinks, rollover states, embedded sound, and video, among others.

Designing an interactive PDF might be advantageous when you want to create an interactive experience for your reader but don’t necessarily want to place this content on a website. Using Adobe InDesign also allows for total creative control of your design, unlike most blog or webpage templates. Another advantage to creating an interactive PDF is that the file size is generally small and easily sent by email.

There are some disadvantages to this format though. To take advantage of the interactive features, your reader must view the file in Adobe Reader. If the file is opened in a web browser or other programs like Preview, the results are often unpredictable. Another drawback is that while InDesign is a powerful program, it takes some time to learn the design workflow. I have found Lynda.com tutorials to be very helpful in providing basic introductions for creating interactive PDFs.

Click here for Lynda tutorial

Recently, Vassar’s Art History Department chose to use the interactive PDF format to build study guides for Art 106. Students in this course are required to identify many works of art and architecture, but making these images available to students in a clear and concise manner has been a challenge for faculty. Interactive PDFs allow students to view a thumbnail image of each work, along with the corresponding metadata. When these thumbnails are clicked, they link to the Luna database that stores high-resolution, and detail views of each work. When the viewer scrolls over each thumbnail, the caption next to the image disappears. Scrolling on and off the image functions like using a flashcard, and is useful for self-quizzing. Even though this format is designed to be viewed on screen, it can easily be printed as well.

Here are links to two interactive PDfs that demonstrate several of the features mentioned in this post. For proper functionality, remember to view these documents in Adobe Reader.

Click here to view an example of the Art 106 interactive PDF.

Click here to view an example of other interactive PDF features.

Share