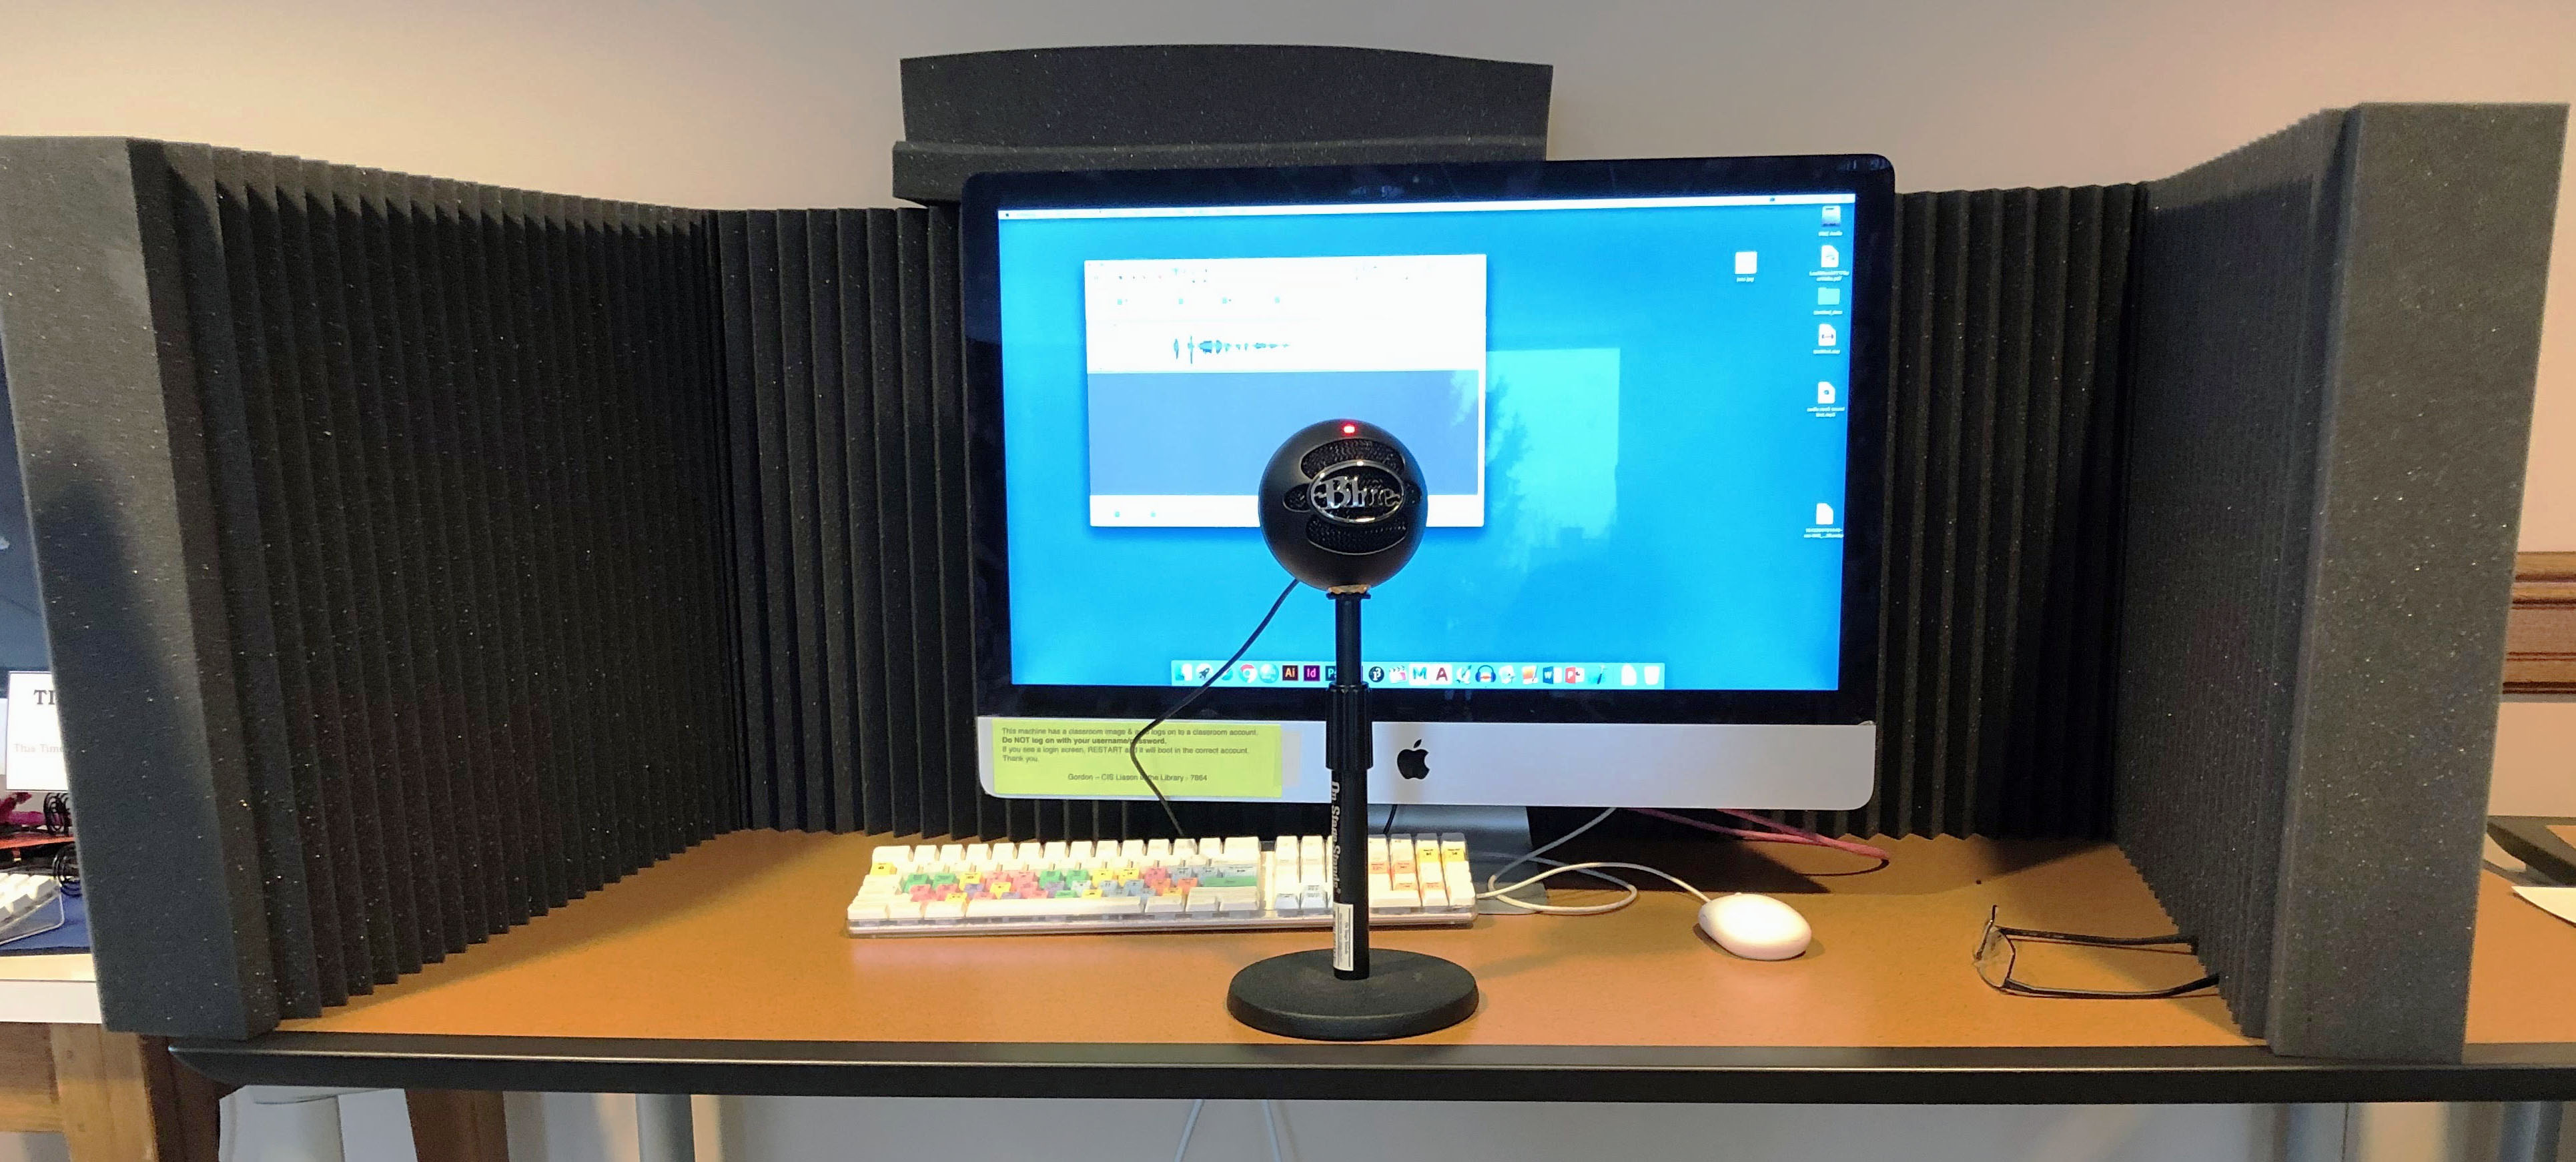
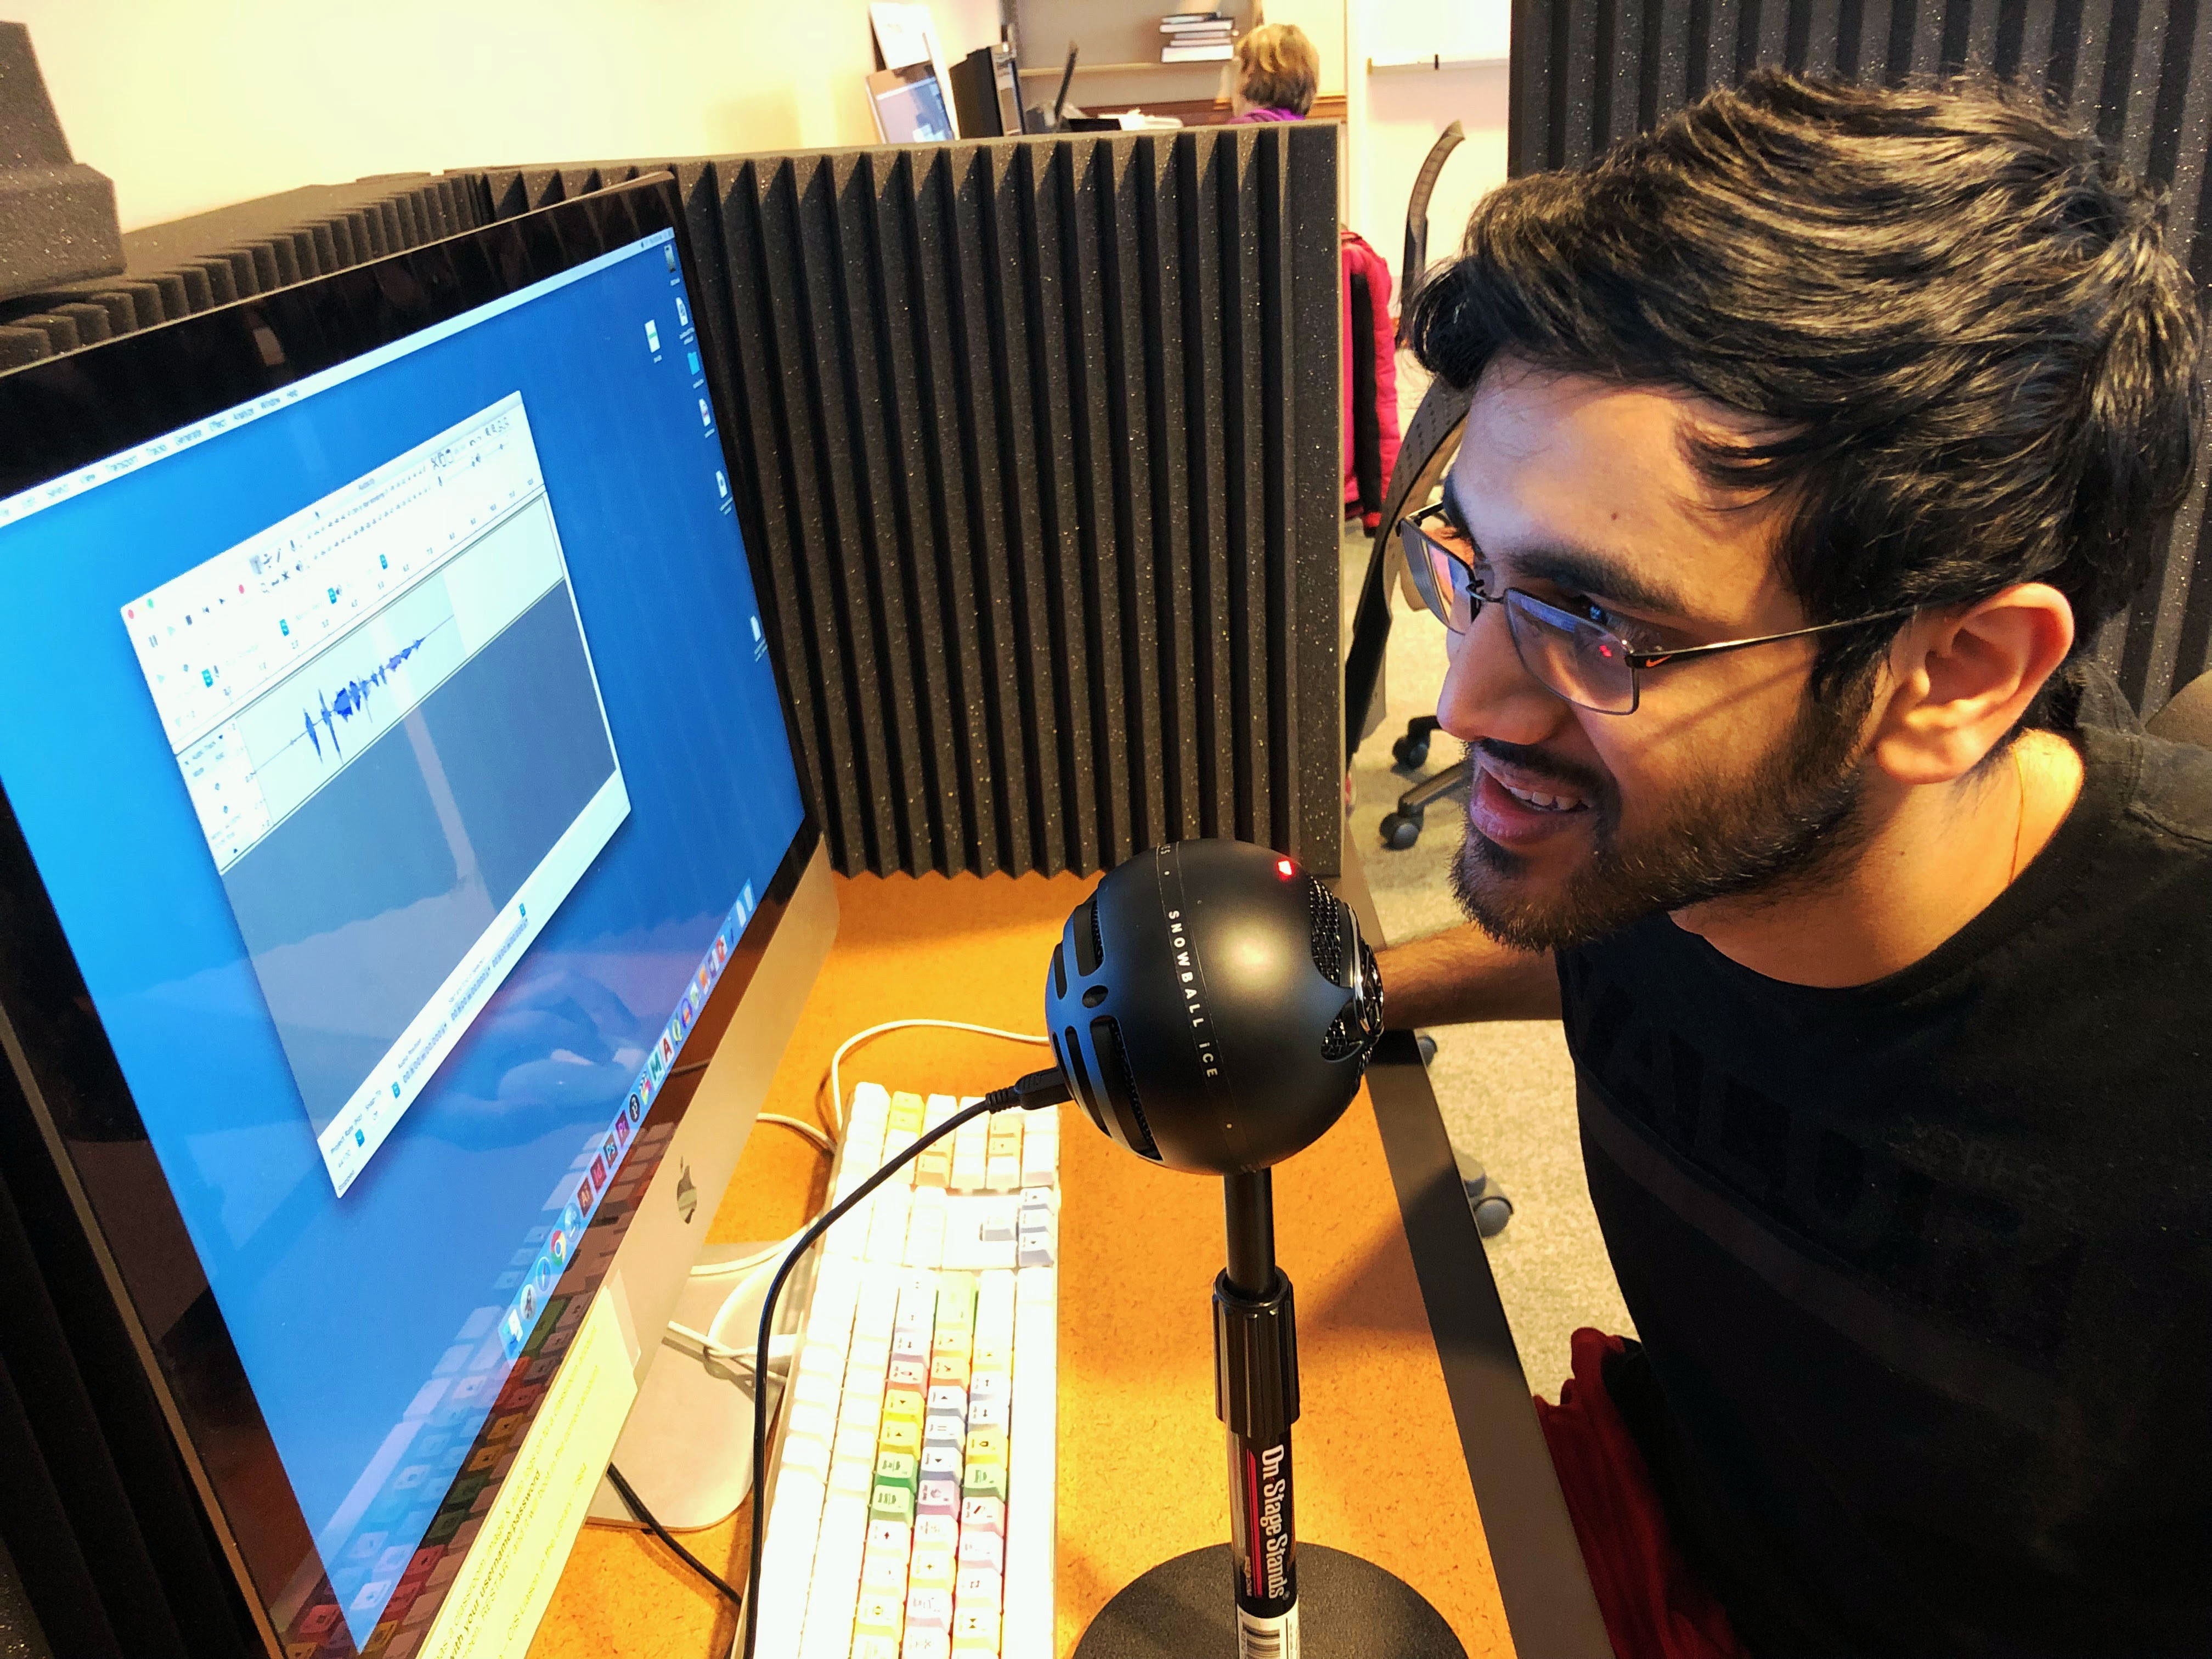
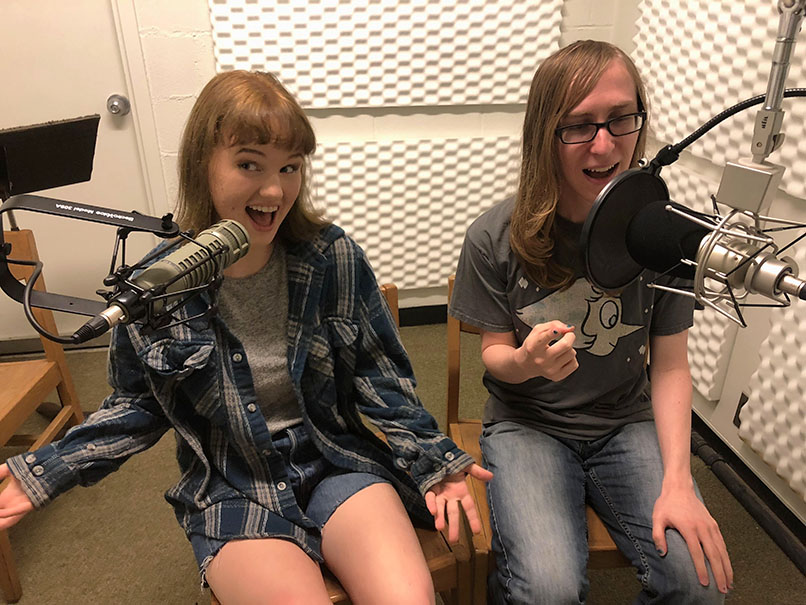
ACS has worked with User Services to install an “audio nook” in the Design Studio. Located in the north wing of the main library, this is a DIY audio recording station. It’s a great place to make a quick recording.
The Snowball cardioid microphone does a great job picking up the speech of the narrator at the same time ignoring background noise. You don’t have to talk very loud, you just need to be close. Listen for yourself!
There are two moveable sound baffle panels which dampen background noise and also provide a degree of privacy while you record.
Here’s another angle featuring Digital Media Consultant Jaineel Doshi ’20.
The Design Studio staff sits at the design studio service desk and can provide help you if you need it.
Other Campus Sound Resources
Chicago Hall Audio Studio
If you need more sound isolation or more privacy, you can arrange to use the Chicago Hall Audio Studio. The space provides more sound isolation and professional quality recording capacity. To arrange to use the space, please email Academic Computing Services acs@vassar.edu.
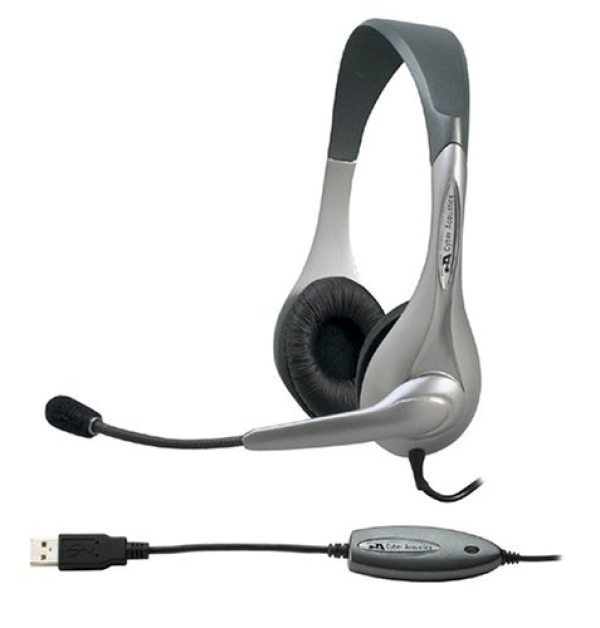
USB Headsets can be signed out from the circ desk for 2 hours at a time. They can also be signed out from Media Resources for a week at time.
Zoom H1 Recorders can be signed out from Media Resources. ACS maintains a classroom set of recorders that can be used for class projects. These are perfect for field recordings. Contact mediaresources@vassar.edu for individual borrowing or acs@vassar.edu for class projects or training.
Audacity is a free program that can be downloaded and installed on Windows or Macs. It is installed on all the Design Studio and Library Electronic Classroom machines. If you need help, please ask a design studio student employee or email Baynard Bailey babailey@vassar.edu
Adobe’s Audition is a “comprehensive toolset that includes multitrack, waveform, and spectral display for creating, mixing, editing, and restoring audio content.” Audition is also installed in the Design Studio and the Electronic Classroom.
What is HPC?
Have you ever tried to run some code or perform some data analysis on your personal computer, and it ended up taking several hours or even days to finish? Frequently, we interact with data sets or projects that are simply too taxing for a single computer (even a very powerful one) to complete. This happens very frequently in a variety of fields across disciplines. High-Performance Computing (or HPC as it is known) is a field in technology concerned with providing advanced computing resources to researchers in order to speed up their data processing or modeling projects. Typically, these computing resources take the form of what is known as a computing “cluster”, which is really just a fancy name for a large number of computers that are all connected together and process data in unison.
Who can benefit from HPC? -Students
-Faculty
-Non-Faculty Researchers
-Administrative Staff
HPC at Vassar (on-campus)
Here at Vassar, we have a computing cluster named “Junior” that was built in 2010. Junior has been used by many faculty and students over the years to run countless analyses and simulations for coursework and research in the Sciences and Humanities. The big advantage of using a system like Junior is that it has what’s called a job scheduler program installed. In Junior’s case, the scheduler program is called SLURM. Slurm enables users to submit the code or analysis that they want to run, and then the system will automatically load the required packages and software to complete the job, and output it into a user-specified format. This means that a user can submit a job that might take the system several days to finish, and then go and work on something else while awaiting the results, confident that work is being performed by the automated processes on the computer the whole time.
HPC at Vassar (off-campus/remote) Here at Vassar, we have access to off-campus HPC resources as well:
Through an agreement with the NSF-supported XSEDE system (The Extreme Science and Engineering Discovery Environment), Vassar researchers are able to apply for computing allocations on a variety of cluster environments that provide abundant libraries of packages, software, compilers, and user interfaces. The best part – It’s completely 100% free for Vassar! Your tax dollars are hard at work creating and maintaining this extensive network of HPC resources for use by all researchers.
Vassar has an agreement with Amazon Web Services (or AWS) to provide for Virtual computing environments hosted in Amazon’s many data centers around the country. While we do pay by the hour for resources through AWS, the scalability and versatility afforded to us through this system are incredibly useful. Computing environments can be built and made accessible to the end-user very quickly and easily by administrators on campus.
We are exploring additional resources such as Google Cloud, Microsoft Azure, products from IBM, and partnerships with other colleges and universities with more robust computing infrastructure. We are also looking into avenues for the upgrade and/or replacement of Junior.
Just a few of the specific HPC projects underway or already completed include:
Chemistry Molecular research by Franco Caruso and Miriam Rossi which utilized Materials Studio in a cluster environment and has resulted in the publication of two successful journal submissions with a third in progress.
Biology research on viruses and bacteria using QIIME and other genetic analysis tools on both the local cluster and in AWS by David Esteban.
Deep learning research and course work using GPU-enhanced computational systems in the cloud by Joshua de Leeuw.
Computational Quantum Chemistry research by Leah I. Bendavid on XSEDE.
Find out More! If you’re interested in learning more about HPC, or getting in touch with other people at Vassar who are using HPC resources, please email Chris Gahn, the ACS Consultant for the Sciences.
If you want to download the audio or the video from a YouTube video, here’s a great resource for you: http://offliberty.com/
It is very straightforward. Paste the YouTube url into the box, and press the power button. After a shortish wait (can be longer if the video is long) you will be given the choice of downloading the audio as .mp3 and/or the video as .mp4.
The demonstrative part of this video begins at 51 seconds in.
I can imagine any number of situations where this utility would be extremely handy. (It is always good to have a backup plan when you are teaching a class.) However, as the website points out, “Sometimes browsing offline content requires permission from its author or owner. Remember to be sure that you have it.”
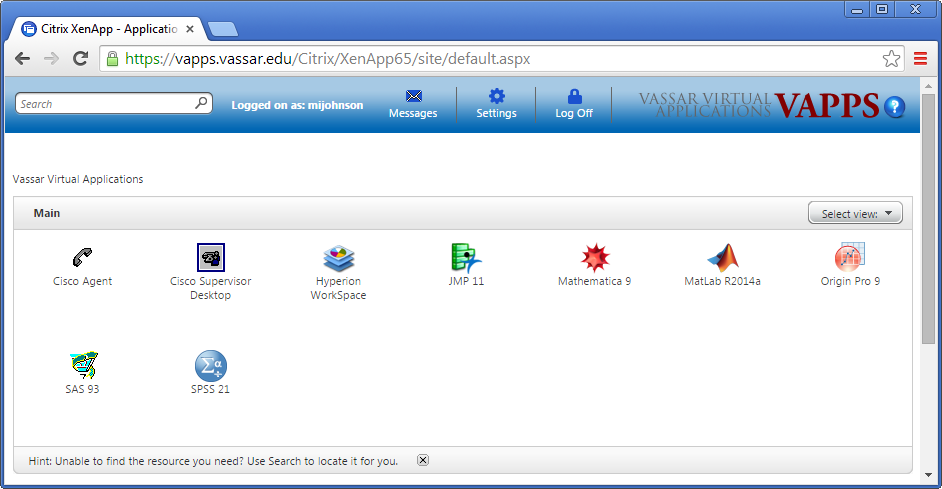
Citrix is an application virtualization product that allows users to connect to a suite of applications not installed on your computer from a wide range of computer systems and mobile devices, both on and off campus. One way to access Vassar’s Citrix applications is to install the Citrix Receiver on your computer or device. Alternatively, you can use a web browser to access the Citrix applications via VApps (Vassar Virtual Applications), which can be found at http://vapps.vassar.edu. Academic applications available on Citrix, via either the Citrix Receiver or VApps, include JMP, MATLAB, SAS, and SPSS, among others. The VApps web interface is shown in Figure 1.
Figure 1. View of a typical VApps session.
LOAD BALANCING
While the ability to access software via Citrix is an invaluable resource for faculty and students alike, both factions have historically found the file system to be confusing and frustrating. Faculty frequently inquire, “Where should I save my files?” or “Where did my files go?” Much of the confusion results from the fact that all applications on Citrix are configured to be load balanced between two or more servers.
Load balancing is a way to distribute incoming traffic among servers hosting the same application content. Load balancing aims to optimize resource use, maximize throughput, minimize response time, and avoid overload of any single resource (Wikipedia, 2014). When one application server becomes unavailable, the load balancer directs new application requests to other available servers in the pool. When you launch an application on Vassar’s Citrix system, you will be directed to a given server based upon a set of rules designed to keep the system load balanced. There is no way to specify a specific server when you log on. If you were to save files to the Citrix server during one session (Server A), there is a 50% chance (or more) that you will be directed to a different server (Server B) on a subsequent session. When this happens, you will not have access to files saved during your previous session. It will seem like your files have disappeared. Eventually, you will end up back on Server A, and your files magically reappear. The load balancing configuration used by Vassar’s Citrix applications is likely the primary reason many Citrix users have had been so baffled by the file system.
SAVING FILES
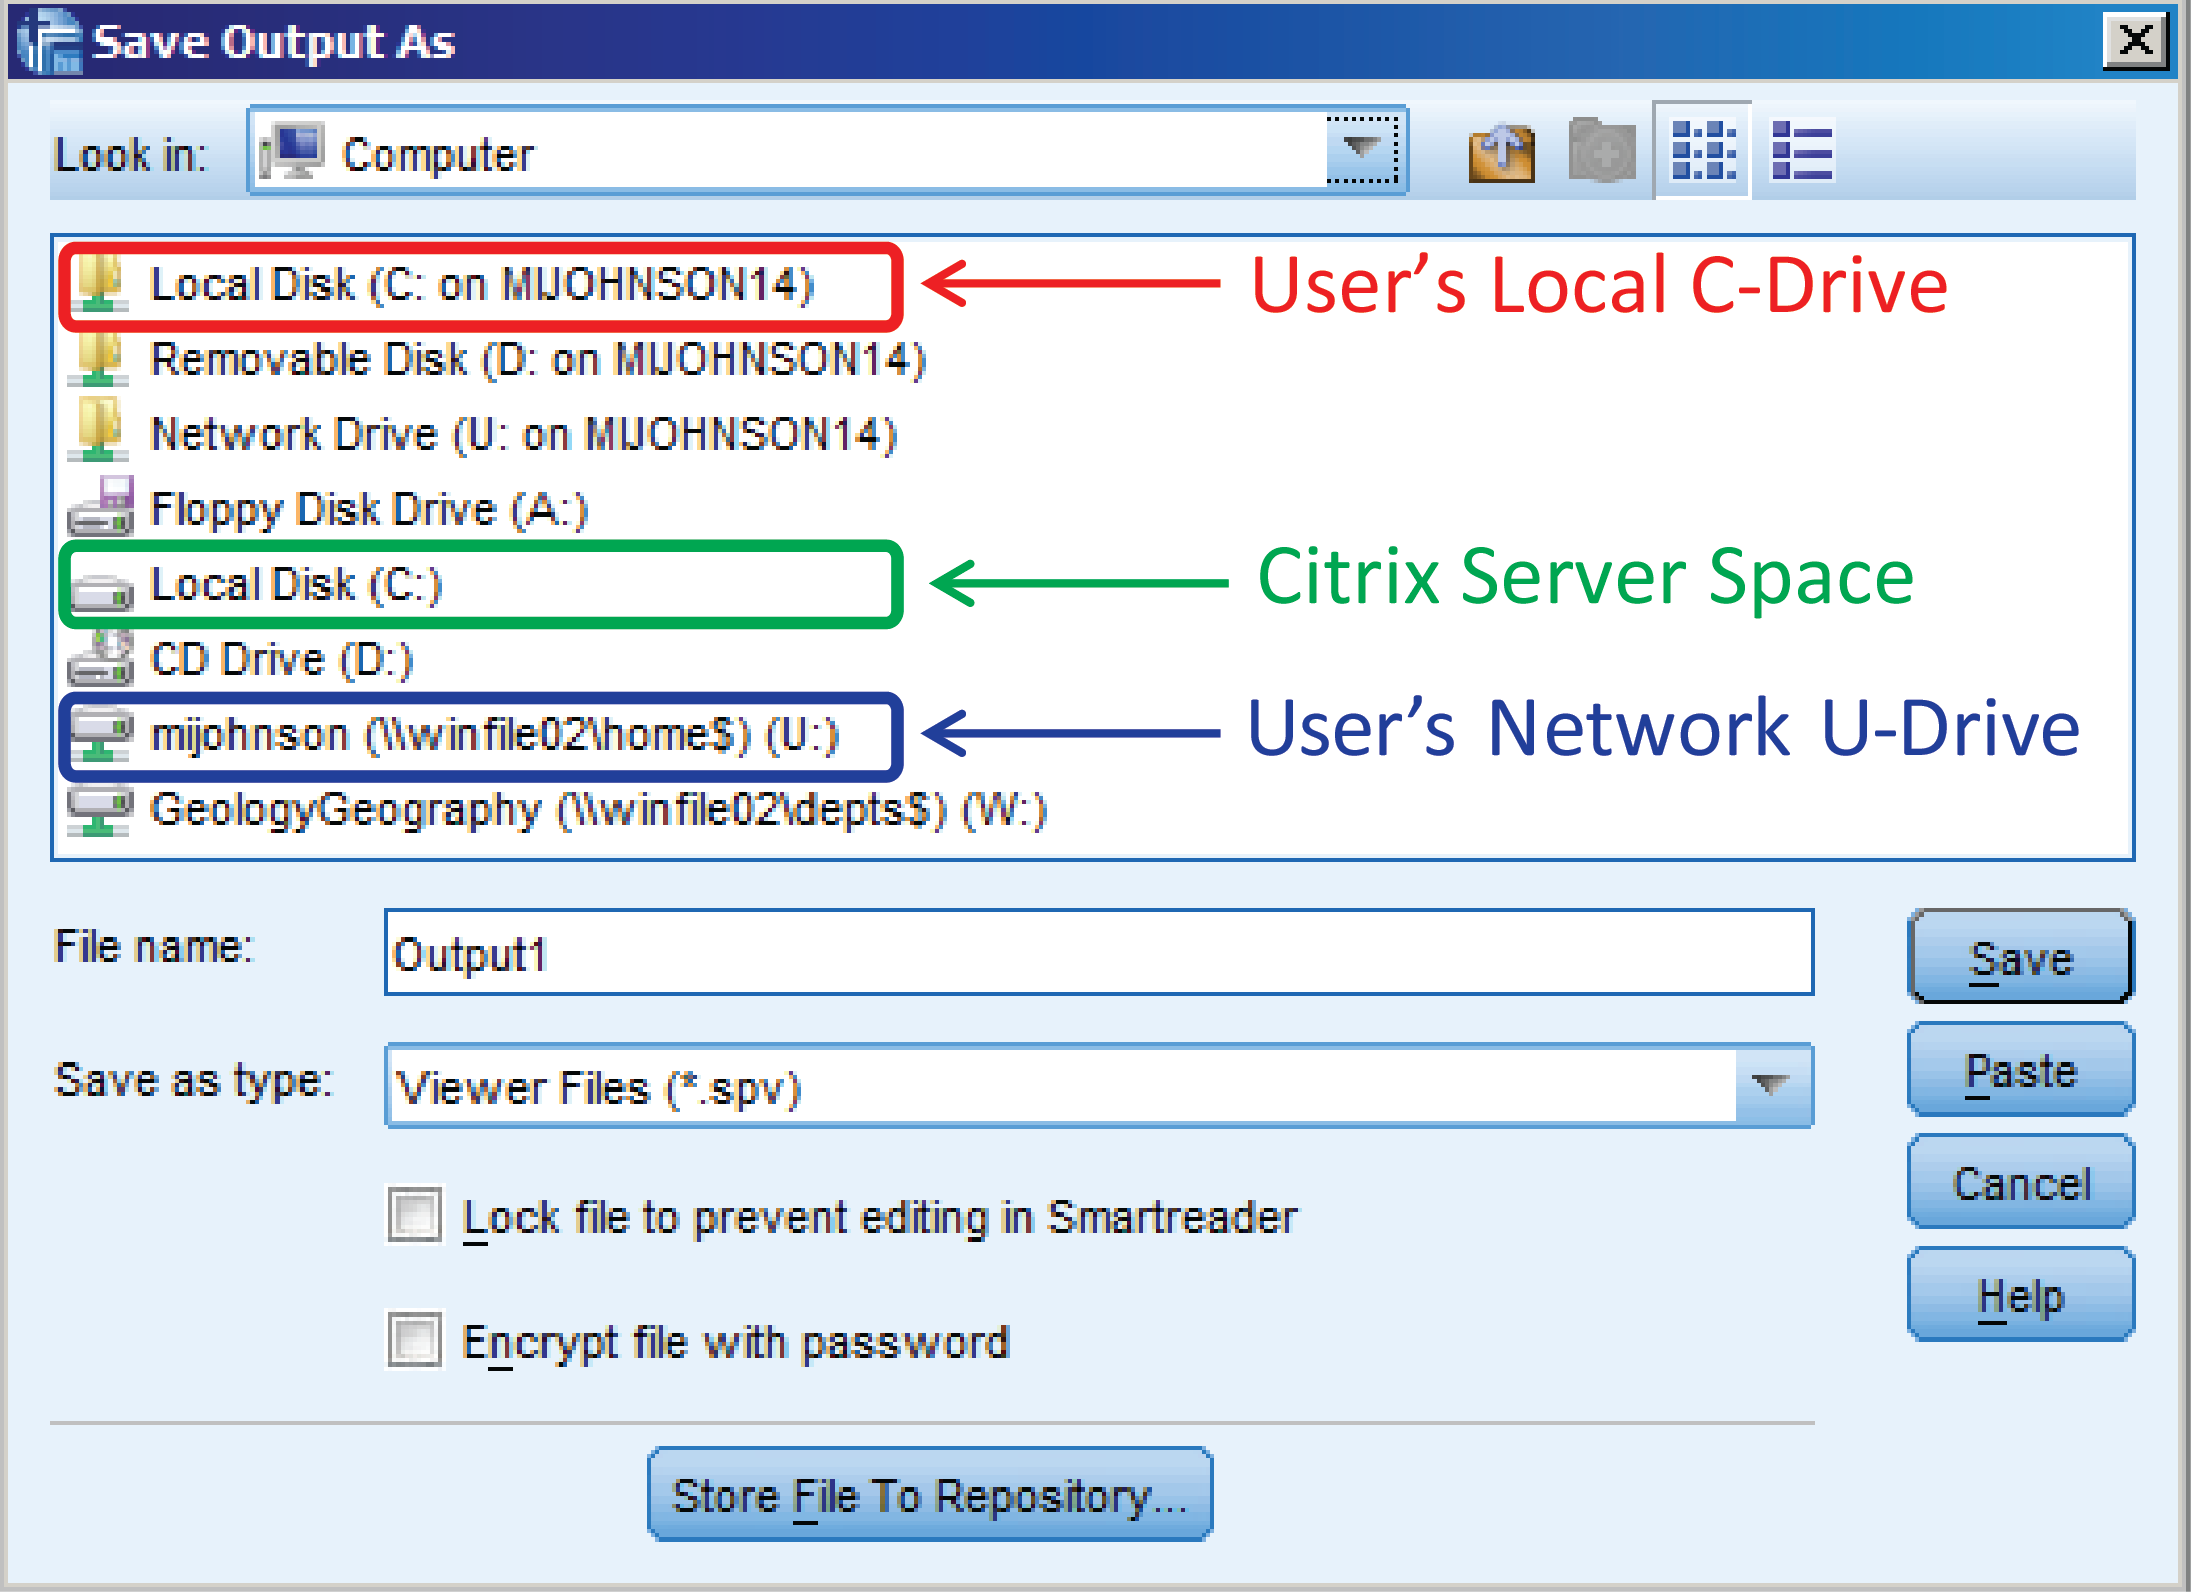
Where should you save your files when working on Citrix? There are a few options to choose from. Select “Save As” and scroll to “Computer” in the drop down menu. You will see a number of drive options similar to those shown in Figure 2.
Figure 2. Common options for saving files on Citrix are shown. Do not save files to the Citrix server space, indicated by the green box. Your network U-drive, indicated by the blue box, is the ideal place to store your Citrix files. Alternatively, you may store files on your local drive.
Your U-drive, a network drive that you can access from any Citrix server, is the best place to store your Citrix files. It is by far the safest environment to store files, because it is backed up 24/7/365, with up to 3 levels of media. Each user is allotted up to 2 GB of U-drive storage. Your U-Drive will be identified as: username (\\winfile02\home$) (U:). Your Vassar user name will replace “username” as shown in Figure 2. Students’ U-drives will be identified as: username (\\stufile02\home$) (U:). If you choose to save to your local machine, you will not, in most cases, be able to access those files when you are working from another location. For example, files saved to your office desktop computer will not be accessible when you are working from home.
SIMPLIFYING ACCESS TO YOUR FILES
I recommend that you create a separate folder on your U-drive for each VApps application that you use. Settle on a clear, consistent naming convention (e.g., My SAS Files, My JMP Files, etc.). You can create these folders the first time you save to your U-drive from a given program. Depending on the program, “Save As” will offer you the option either via a new folder icon ( or ) or a “New Folder” button near the top of the “Save As” window. Alternatively, you may be able to access your U-drive via your local computer. Most Windows allocations will be set up with your U-drive as a mapped network drive. In this case, you can simply open Windows Explorer and navigate to Computer → username (\\winfile02\home$) (U:), where you can create new folders and access your files. This drive is normally not mapped on Mac allocations. To connect to your U-drive from a Mac, click on the Finder, go to the “Go” menu, and click on “Connect To Server.” Enter smb://winfile02.vassar.edu/home$/[username] in the Address field, click the “+” button to save to favorites, and click “Connect” to mount the space. The space gets mounted at /Volumes/[username], but it should also appear on the desktop, depending on how the Finder preferences are set.
Once you have created new folders to organize your U-drive, you can create shortcuts, default folders, libraries, etc. that will simplify access to your files. Unfortunately, the process must be repeated, due to load balancing, in order to implement access points on each server hosting the particular software being used. You should use the same name on each server for whatever access points you create. Since you cannot specify which server will be used for each Citrix/Vapps session, it may take a few VApps sessions (logging out and logging back in) before you have logged into each server and created identical access points on each. Below are some examples of how to facilitate access to your U-drive.
SAS
Create SAS libraries linked to a folder on U-drive. Click Tools → New Library. Give the library a name, click the “Enable at startup” box, browse to the appropriate folder on your U-drive (Look in: Computer), and click OK.
Make shortcuts to specific files. Click Tools → New File Shortcut. Give the shortcut a name and click the “Enable at startup” box. Then, browse to the appropriate folder, and click OK.
JMP
Set file location preferences via the File → Preferences menu. Select “File Locations” and set preferred locations for the “Data Files” and “Save As” directories. Browse to the appropriate folder, click the box to “Always go to this directory…,” Apply the changes and click OK.
Create a new Project via the File → New → Project menu or by clicking the “New Project” icon () in the Projects window. Right-click on the new Project to add folders and documents from your U-Drive and change other settings.
SPSS
Define startup folders for Open and Save dialogs. Select Edit → Options and click on the “File Locations” tab. Browse to the desired folders on your U-Drive. Click Apply, and then OK. Provide Session Journal location and file name, if desired.
MATLAB
Reset default “userpath” and change startup folder to new userpath.
Origin Pro
Specify your “User Files Folder.” Select Tools → Options and click on the “System Path” tab. Click on “User Files Folder” and click the “Change…” button. Browse to the designated folder on your U-Drive. Click OK to select the folder, to change the path of the folder, to close the restart notification, and finally to close the Options window. Restart Origin to implement the change.
Remember that you will have to repeat the process on subsequent sessions until you have done so on each server hosting a particular application. For a seamless experience, use the same names on each server when creating libraries and shortcuts.
The term “interactive PDF” refers to a PDF file designed to be viewed on screen. Interactive PDF features are the parts of a PDF that provide your audience with additional functions that are more commonly found in websites. Some of these features include buttons, hyperlinks, rollover states, embedded sound, and video, among others.
Designing an interactive PDF might be advantageous when you want to create an interactive experience for your reader but don’t necessarily want to place this content on a website. Using Adobe InDesign also allows for total creative control of your design, unlike most blog or webpage templates. Another advantage to creating an interactive PDF is that the file size is generally small and easily sent by email.
There are some disadvantages to this format though. To take advantage of the interactive features, your reader must view the file in Adobe Reader. If the file is opened in a web browser or other programs like Preview, the results are often unpredictable. Another drawback is that while InDesign is a powerful program, it takes some time to learn the design workflow. I have found Lynda.com tutorials to be very helpful in providing basic introductions for creating interactive PDFs.
Recently, Vassar’s Art History Department chose to use the interactive PDF format to build study guides for Art 106. Students in this course are required to identify many works of art and architecture, but making these images available to students in a clear and concise manner has been a challenge for faculty. Interactive PDFs allow students to view a thumbnail image of each work, along with the corresponding metadata. When these thumbnails are clicked, they link to the Luna database that stores high-resolution, and detail views of each work. When the viewer scrolls over each thumbnail, the caption next to the image disappears. Scrolling on and off the image functions like using a flashcard, and is useful for self-quizzing. Even though this format is designed to be viewed on screen, it can easily be printed as well.
Here are links to two interactive PDfs that demonstrate several of the features mentioned in this post. For proper functionality, remember to view these documents in Adobe Reader.
Narrated recordings of slides can be useful for providing supplementary information to students, or to help prepare for upcoming class activities. They can serve as a component of a flipped, or partially-flipped, classroom, or simply provide complementary material for a traditionally-structured classroom. Microsoft PowerPoint and Macintosh’s Keynote are two of the most popular software options for producing slideshows. In Keynote, narration of a slideshow results in a single audio file, whereas a PowerPoint slideshow narration produces individual audio clips for each slide. The single audio file model of Keynote introduces some difficulties when one wants to insert a slide, or rearrange slides, after the full presentation has been recorded. While one can generate individual audio clips in an external program, such as QuickTime Player, and drag them into Keynote, it is not a simple process and, in the end, PowerPoint wins out for the flexibility and simplicity offered by its model of an individual audio clip for each slide.
Using your computer’s built-in microphone or a USB microphone, you can create your own narrated slideshow. The following instructions are specific to a Mac, however the procedure is very similar when using a PC. After connecting the mic, if necessary, be sure to select the appropriate audio input/output source in system preferences. Open your PowerPoint file and select the first slide. Click the tab labeled Slide Show. Then, under Presenter Tools, select Record Slide Show. After selecting Record Slide Show, the audio recording screen opens and recording starts immediately. You can pause ( ll ), restart ( ↺ ) & continue ( ▷ ) as needed. Click on the forward arrow at the bottom of the current slide (or use arrow keys) to advance. Press the esc button or Exit Show at top-center to finish recording. Select yes when asked if you want to save your slide timings (this includes audio). As you can see, the procedure for creating a narrated slideshow in PowerPoint is quite simple.
Screenshot of audio recording in PowerPoint on a Mac.
Any subsequent editing is also straightforward. For example, to re-record audio for a single slide, simply select the slide, then select Slide Show → Record Slide Show. Make your recording for the individual slide and esc, or Exit Show, when finished. You may also insert a new slide anywhere in the lineup and add audio to that single slide without causing the audio to fall out of sync on the original slides. Another layer of multi-media that one may take advantage of is that of adding video/movie clips to slides. It is not a difficult task and may be worth exploring as an additional enhancement to your presentation.
It is important to save your presentation as PowerPoint Presentation with the filename extension *.pptx. The format designed to be compatible with earlier versions of PowerPoint (PowerPoint 97-2003 Presentation), which uses the extension *.ppt, has a number of features disabled. As a result, students watching the slideshow on a Windows machine will not be able to take advantage of the “s” shortcut for pausing and restarting the presentation. Finally, when you are ready to share your presentation with students by posting it on your Moodle site, for example, you may wish to save it as a PowerPoint Show (*.ppsx). When students double-click on the file icon, it will automatically launch into the show mode, and they won’t be able to edit your slides.
If you have any questions or would like additional information, please contact Shelly Johnson, ACS liaison for the Sciences, at x7866 or mijohnson@vassar.edu.
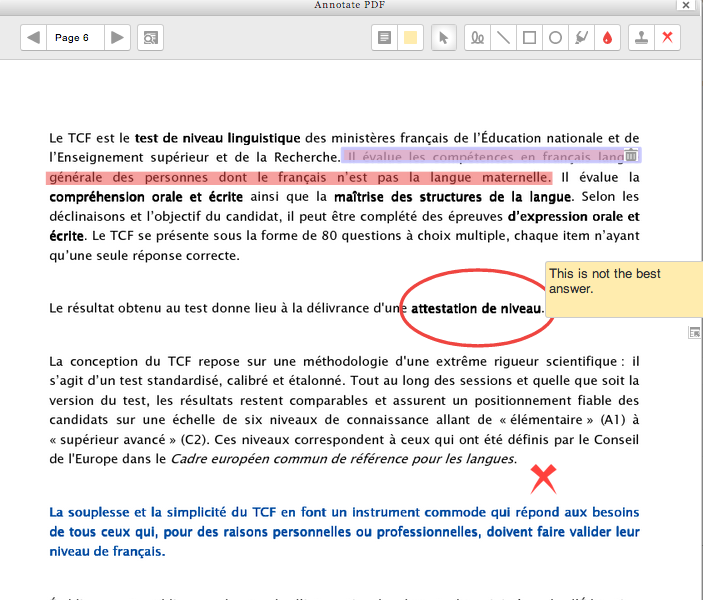
With the recent upgrade to Moodle 2.6, instructors have a new function available: If a student uploads an assignment in the form of a PDF file, the instructor can make various types of annotations to the file directly within Moodle. Previously, they would have to download the file, use some program that provided annotation functions, then upload that revised version to Moodle, for the student to download. Now that can be done within Moodle.
Annotation functions include highlighting, circling, drawing, stamping an available graphic (like a checkmark or an X), and writing Post-It-type notes.
R is becoming the most widely used statistical software in academic science and it is rapidly expanding into other fields. R is a free language and environment for data manipulation, calculation, graphics and much more. It runs on all of the major platforms, including Windows, Mac and Linux. While it is command line driven, several good graphical user interfaces (GUIs) exist that open it up to a wider group of users with differing technical abilities.
Popularity
When various metrics for the most popular data analysis software packages are compared (Muenchen, R.A., 2013), R demonstrates a dramatic increase in popularity over the previous 5 to 10 years. A plot of posts to email discussion lists, shown below, illustrates a rapid growth in discussion of R. And over the past few years, R has become the most discussed software by nearly a two-to-one margin. However, one must be careful when interpreting these results. For example, the consistently low level of discussion for SPSS may be reflective of the fact that it has a simple interface leading to less of a need for discussion. However, there are also fewer variations in analysis offered in SPSS than those that exist in R and other applications with somewhat less user-friendly interfaces.
Sum of monthly email traffic on each software’s main listserv discussion list. From “The Popularity of Data Analysis Software”, http://r4stats.com/articles/popularity/.
User Friendly Interfaces
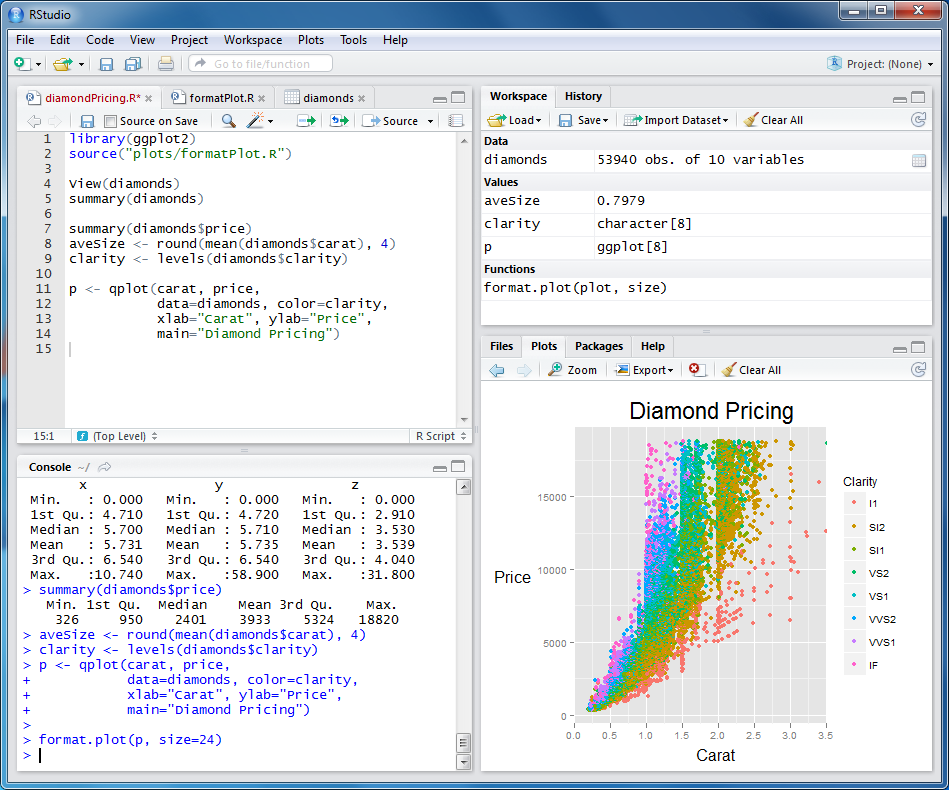
Over the past few years, a number of GUIs for R have been developed that make R more accessible to a wider group of users. RStudio, a popular GUI for advanced users, is what is known as an integrated development environment. This interface is similar to MATLAB, is designed for programmers, and provides syntax highlighting and integrated help among other features.
Screenshot of the popular Rstudio graphical user interface.
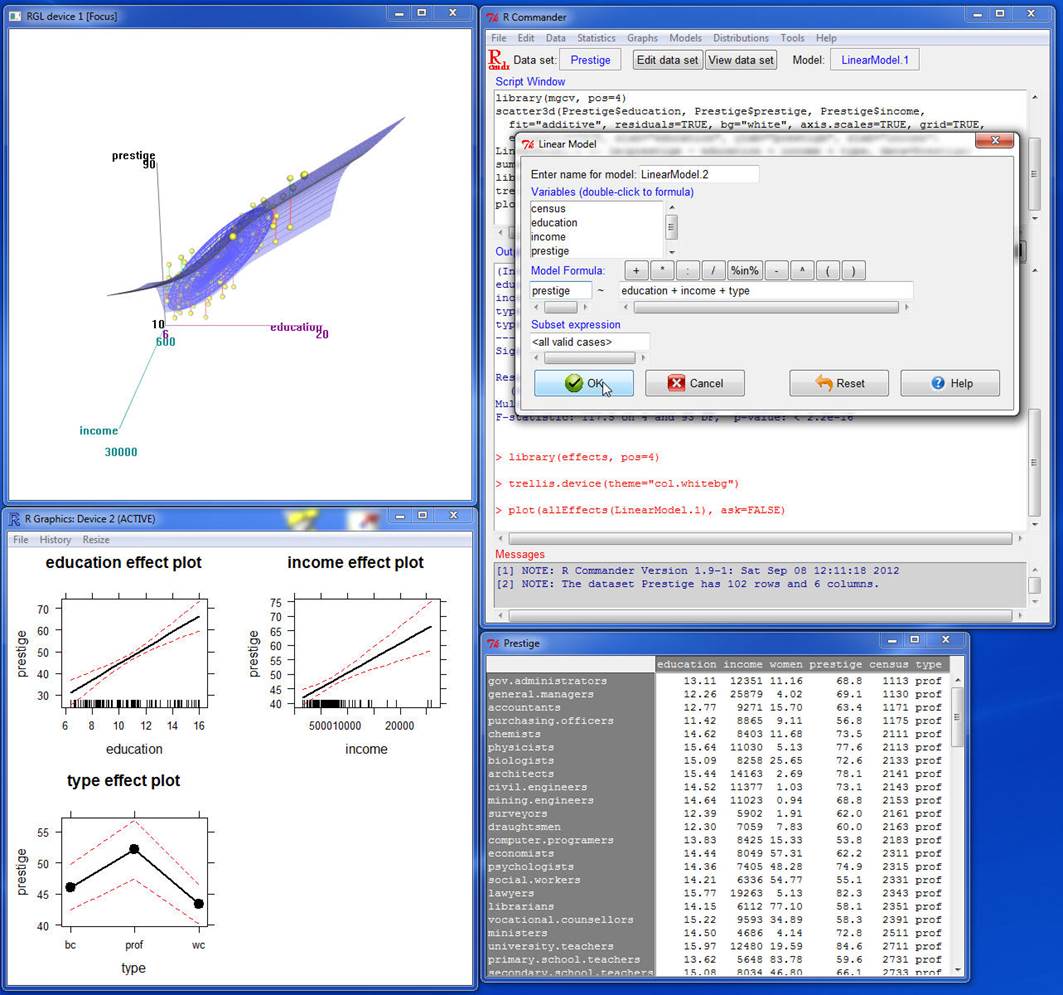
Rcmdr, pronounced Rcommander, is a basic-statistics GUI that offers menus, buttons, and dialog boxes to simplify usage for those with less advanced technical skills. The commands that are generated via the user’s actions are shown in an output window. They can be edited and resubmitted, if desired, helping to familiarize the user with the R language. This is useful for those with moderate technical ability who are interested in learning basic R commands. A third R GUI, Deducer is designed to be a free, easy-to-use alternative to proprietary data analysis software such as SPSS, JMP, and Minitab. It has a menu system to do common data manipulation and analysis tasks, and an excel-like spreadsheet in which to view and edit data frames.
Screenshot of the Rcmdr graphical user interface.
Availability
R and RStudio are installed in the SciVis Lab located in the Mudd Chemistry Building. Additionally, both R and the GUIs mentioned above are freely available and can be easily installed on your personal computer. RStudio also offers a web-based version that can be used in lieu of the desktop version. The availability of a web-based server means that one doesn’t have to install software on a personal computers or go to a computer lab. It can be accessed anywhere there is an internet connection. Our system administrators are in the process of evaluating whether it is feasible to host an RStudio web server on campus, and we are hopeful that this convenience will soon be available to the Vassar community. If you would like to learn more about R, please contact ACS liaison Shelly Johnson.
Prezi is a tool for creating presentations, just as Powerpoint and Keynote are, but with some interesting differences. Since its creation in 2009, it’s been seen more and more in conferences.
Metaphors
One way in which Prezi differs from earlier presentation tools is its metaphor. Both Powerpoint and Keynote use the metaphor of a series of individual slides that can be shown in a predetermined sequence, just as 35mm slides would be shown with a carousel projector.
In Prezi’s metaphor, the creator arranges materials on an infinitely large canvas and— as I think of it— uses a video camera to pan and zoom through those materials. That can be done on the fly or the creator can pre-record a series of pans and zooms. The resulting presentation maintains the spatial relationships among the various materials.
It’s On the Web
Although they can be downloaded, “Prezis” are assembled on the web, through your browser, and can be presented via your browser as well. They can be shared with the general public or with a select group of colleagues (or members of a class.) You can even collaborate with others on the creation of your Prezi, which makes it a great vehicle for group projects.
Good and Bad Uses
I’ve seen great uses of Prezi and uses that make no sense at all— unfortunately, quite a few of the latter. If your presentation materials consist of a series of bullet-point lists, quotations, graphics, etc. that have no particular spatial relationship to each other, then there’s no particular reason to lay them out side by side and pan from one to another. But if there are spatial relationships— such as in a complex chart, diagram or map— then Prezi may be the perfect tool.
Here are a few examples of great uses for Prezi. You can pan and zoom on your own, or click the Play button to step through a pre-recorded tour.
“Classification of Organisms,” created by Robert Kappus, will lead you systematically through a complex chart. The chart is circular, and the zoomed-in labels and graphics are aligned along radii of the circle, but that poses no problem, as the pre-recorded tour can not only pan and zoom, but rotate the view as well.
The “Physical Features of Africa Quiz” Prezi, created by Emily Thompson, will give you a tour through the major mountain ranges of Africa. Maps tend to be difficult things to project in a classroom, because the amount of detail means that labels often are too small to see from a distance. Prezi is a great vehicle for showing detailed maps, because of the extreme levels of zooming it can support.
One of my favorite uses of Prezi is to explore different details of a complex work of art. Here’s one that I created, providing a tour through some of the details of the painting Garden of Earthly Delights, by Hieronymus Bosch. An instructor can present a series of details from a work like this, without losing the context of each detail.
A number of people have realized that Prezi can be a good tool for creating a concept map— a diagram that shows relationships among various concepts. Here’s an example of a Globalization concept map, created by Dennis Carnduff.
Go to the Prezi website to explore other materials that various people have made public, to get more ideas on how it can be used.
Licensing
Prezi offers three levels of licensing:
Public, which is free, provides you with 100 MB of storage, but requires you to make your creations public.
Enjoy, which costs $59/year, provides 500 MB storage and allows you to make your creations private.
Pro, which costs $159/year, provides 2GB storage.
However, students and teachers— anyone with an “edu” email address— can get the Enjoy level of license for free.
Prezi U
The website also provides a gateway to “Prezi U,” a community of educators who share ideas about using Prezi in their teaching.
Recently, Pete Naegele shared via a NITLE mailing list an article titled “101 Free Alternatives to Commonly Used Paid Software“. I thought people might not have time to review all 101, so I’m cherry picking those I find most suitable for Vassar faculty. (Note: I’m also only picking things that are options for Windows AND OSX users.)
Google mail syncs with practically every email system out there. It’s a great client. It can handle multiple accounts and will automatically reply with the email account you pick. The Google search-ability and portability is unmatched. A Gmail account also opens the door for a whole host of applications they offer (Google Docs, Google Calendar, YouTube, Google Reader, the list goes on….) They’ve just released a new priority In Box feature that helps you deal with get control of your In box. Amazing! If you don’t have a Google account already, what are you waiting for?
Thunderbird is a cross-platform open-source mail client that works great. It even comes on Linux.
Office Programs
Google Docs (as an alternative to Microsoft Office)
Google Docs has the core programs of Micros, such as word processing, spreadsheets and calendars, and not only is it free, but it can be accessed anywhere thanks to cloud computing. You can also edit documents simultaneously with collaborators and/or publish to the internet. The online form enables you to collect data via email or websites, with instantly graphed results. Stop emailing documents to yourself and join us in the clouds.
OpenOffice (as an alternative to Microsoft Office)
As an open source office suite, Open Office allows for the utilization of the best office programs online such as word processing, spreadsheets, presentations, graphics and databases. User contributions can be made to the project, which means that it is constantly growing and evolving.
An easy and efficient way to store, share and sync your files, Dropbox is a cloud service that allows users to access their files anywhere in the world. Very popular!
WordPress is a simple and easy way to publish to the Internet. It can handle simple static sites or more complex sites. Faculty and students working with faculty can request a WordPress site hosted by Vassar here. Training and support available from ACS.
Also known as the GNU Image Manipulation Program, GIMP allows for easy image composition, retouching and photo authoring. It also works on all operating systems. It does just about everything you need in Photoshop.
Flickr is a great way to store photos and to share photos. It also comes with a whole suite of plug-ins and functionality. If you like to take digital pictures, you’ll instantly like and later fall deeply in love with Flickr. The free one is great and the professional upgrade (with unlimited storage!) is only $25.00 a year. It was developed by a Vassar grad! If you need uncopyrighted images, remember to visit the Flickr Creative Commons.
A player that is capable of playing almost every file and media codec, the VLC player means that you don’t have to open and close different programs to run DVDs, VCDs, CDs, web streams and other forms of media. Especially great at creating screenshots from DVDs or videos.
Not everyone can go to college, but everyone who has a computer can access iTunes U. Filled with subscribe-able podcasts and video podcasts on every subject imaginable. The media can be played on phones, computers, .mp3 players, or i-anything. If you are interested in developing content for Vassar’s iTunes U, please email me (babailey [@] vassar.edu).
"Skype: the fabulous voice system able to put your family together.” Ad designed by advertising agency Moma
Voip (voice over IP) service to make free computer to computer calls, or cheap computer to phone calls. Very popular amongst those who like to make calls overseas.
Hulu is a front runner of online video services. Their tagline is “watch your favorites, anytime, for free.” If you missed that last week’s episode of “The Office” and don’t have a DVR, this is the site for you. They have a bevvy of free content or you can pay a modest fee for upgraded services. Embed their player right in your Moodle site!
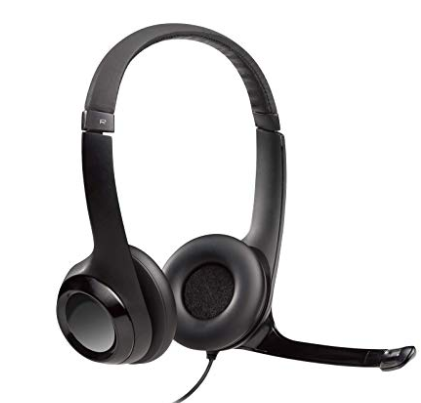 USB Headsets can be signed out from the circ desk for 2 hours at a time. They can also be signed out from Media Resources for a week at time.
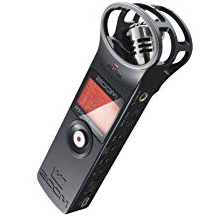 Zoom H1 Recorders can be signed out from Media Resources. ACS maintains a classroom set of recorders that can be used for class projects. These are perfect for field recordings. Contact mediaresources@vassar.edu for individual borrowing or acs@vassar.edu for class projects or training.
 Adobe’s Audition is a “comprehensive toolset that includes multitrack, waveform, and spectral display for creating, mixing, editing, and restoring audio content.” Audition is also installed in the Design Studio and the Electronic Classroom.