After your picture is locked, it’s time to export your project for mixing in ProTools. You might do this work yourself or you may be sending it out to be done by a professional. In either case, you’ll be exporting an AAF or an OMF. Both these formats create a new file with trimmed audio and all the metadata from your project so when you import into Pro Tools everything is exactly where it should be.
Exporting an OMF
Exporting an OMF is very similar to exporting an AAF and it creates a similar file. Some audio engineers may ask for it depending on their software or workflow.
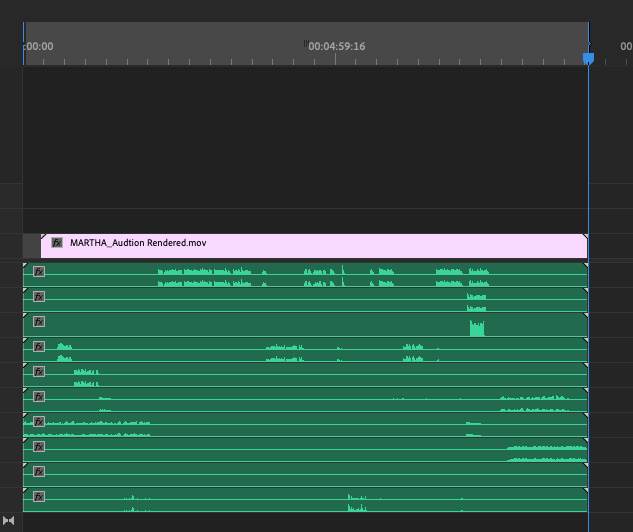
Set an in and out point for the length of your project. Be sure to note start and end timecode.
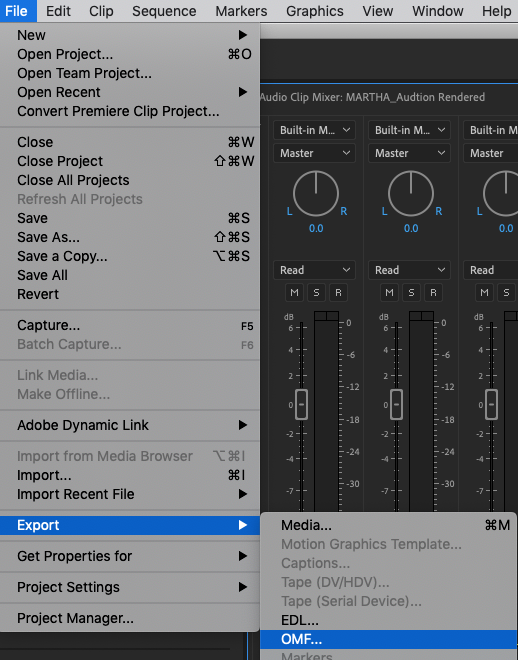
Go to File > Export > OMF
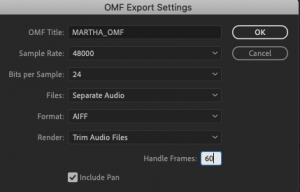
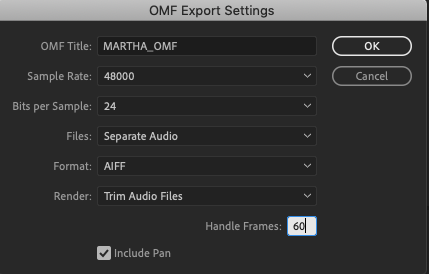
The OMF dialog box will open.
- “Sample Rate” and “Bits per Sample (Bit Depth)” should match the project settings.
- “Files” should be set to “Separate Audio. This insures that each clip is exported as its own file.
- “Format” is “Broadcast Wave” and we want “Trim Audio Files”.
- Since we are exporting trimmed files, set “Handle Frames” to 60 frames. We do this so the audio engineer can drag out the clips if they needed.
Next, choose a location for the export. It’s a good idea to make a folder in the main project tree called “OMF.” This allows the project to stay organized. Click “Create” and “Save”, then “OK”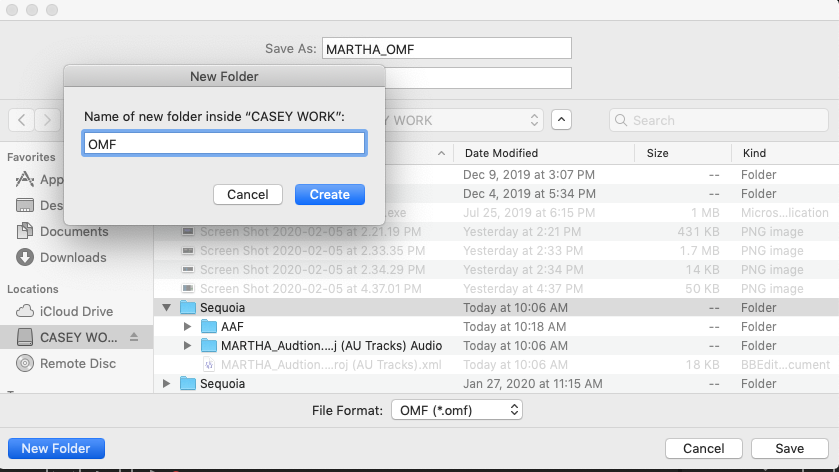 The last step to to export your video. You will want to export your video as a 1080p H.264 file. Be sure to uncheck the “Export Audio” box as you don’t need that track in ProTools. For more information on exporting from Premiere Pro, check out “Premiere Pro – Exporting Media” page here.