Adobe Premiere Pro is great since it lets you open and playback virtually any kind of camera media. Unfortunately, camera codecs aren’t always the best choice to use when editing. Non-linear editing software works better when you use an editing codec like Apple ProRes or Avid DNxHD.
Proxies
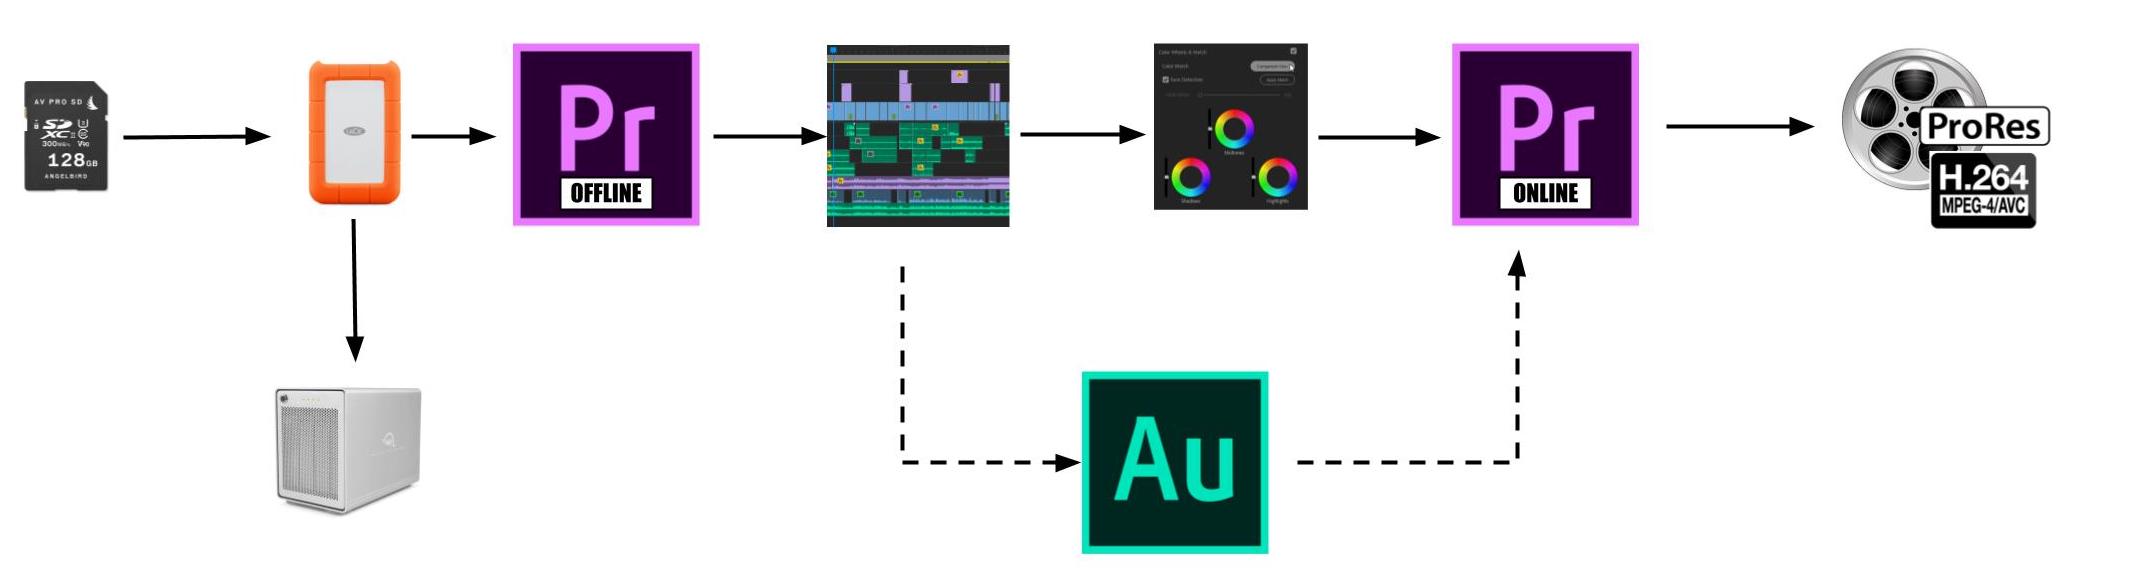
Proxy media stands in for camera original media in the offline editing phase. Usually, this is because the camera original is too large (4K, 6K, 8K) or too data intensive (RAW) to allow you to edit smoothly. Creating a proxy version of your original media allows you to edit on all sorts of computers (even laptops) without having to worry about performance. This process is also referred to as an offline/online workflow. The “offline” part is when you are editing with proxies and the “online” part is when you relink to your camera originals to create the final output of your project.
Transcodes / HD Edit Masters
There’a another reason to transcode camera media into edit-friendly codecs. Even for HD projects, we recommend transcoding all your camera original media, especially for larger projects. Rather than doing an offline/online workflow, these “proxies” essentially become your new camera original media. We like to call them “HD Edit Masters”. Yes, it takes time up front to generate them, but it results in trouble-free editing and makes exporting to Apple ProRes a breeze.
We recommend that you transcode your media before editing in Premiere Pro. Adobe Prelude/Media Encoder or Davinci Resolve are two easy ways to do it. If you’d rather see how to do this in a video, you can find them on our YouTube channel.
Adobe Prelude/Media Encoder (Rooms 206, 214, 215)
- Open Prelude, create a new project and save it to your portable drive.
- Click the “Ingest” button at the top to open the Ingest window.
- Use the browser on the left side of the Ingest window to locate your camera original media on your portable drive.
- Select all the clips from the folder you would like to transcode.
- In the Transfer window, check “Transfer Clips to Destination.” This step allows you to choose a destination for your transcoded files.We recommend keeping a dedicated “Proxies” or “Edit Masters” folder within your project’s media folder.
- Deselect “Add Subfolder”
- Check “Transcode”
- Under the “Format” drop-down menu, select “QuickTime”
- In the “Preset” drop-down menu, select “Apple ProRes 422 (HQ)” for HD Edit Masters or “Apple ProRes 422 Proxy” for Proxies.
- Make sure “Stitch Clips Together” is deselected.
- Finally, select the “Ingest” button to the lower right corner of the window to transcode your media. You may notice that Adobe Media Encoder opens in the background. This is normal. Expect the render to take 60-70% of the total running time of your footage.
- Your transcoded media can now be imported into Premiere Pro in an edit-friendly codec! You can import your transcoded media to Premiere Pro using the workflow here.
![]()
Davinci Resolve (Room 207)
- Open Davinci Resolve and select Untitled Project to create a new project. Name and save your project once Davinci Resolve opens.
- In the Media Pool, right-click and select “Import Media.” Navigate to your camera original media, select all the clips and import.
- Select all the clips in the Media Pool, right-click and select “Create New Timeline Using Selected Clips”
- Click on the “Deliver” section at the bottom of the Resolve interface. This is where you will select your transcode parameters.
- In the upper left hand corner, select “Vassar_QT_Proxy” to create proxies for 4K or RAW media. Select “Vassar_QTProRes_MASTER” to create HD edit masters.
- Click “Add to Render Queue” at the bottom of the render setting panel and select a destination for your files. We recommend keeping a dedicated “Proxies” or “Edit Masters” folder within your media folder.
- Select “Start Render” on the right-hand side of the screen to begin rendering. Proxy renders are very fast in Davinci Resolve and Edit Master renders take a bit longer. Expect it to take about 60% of the total running time of your footage.
- Your transcoded media can now be imported into Premiere Pro in an edit-friendly codec! You can import your transcoded media to Premiere Pro using the workflow here.
![]()