Once you have imported media, organized your project, and created syncs it’s time to edit. Most of your editing will be done in the default Premiere Pro “Edit Workspace.” Let’s dive into the interface.
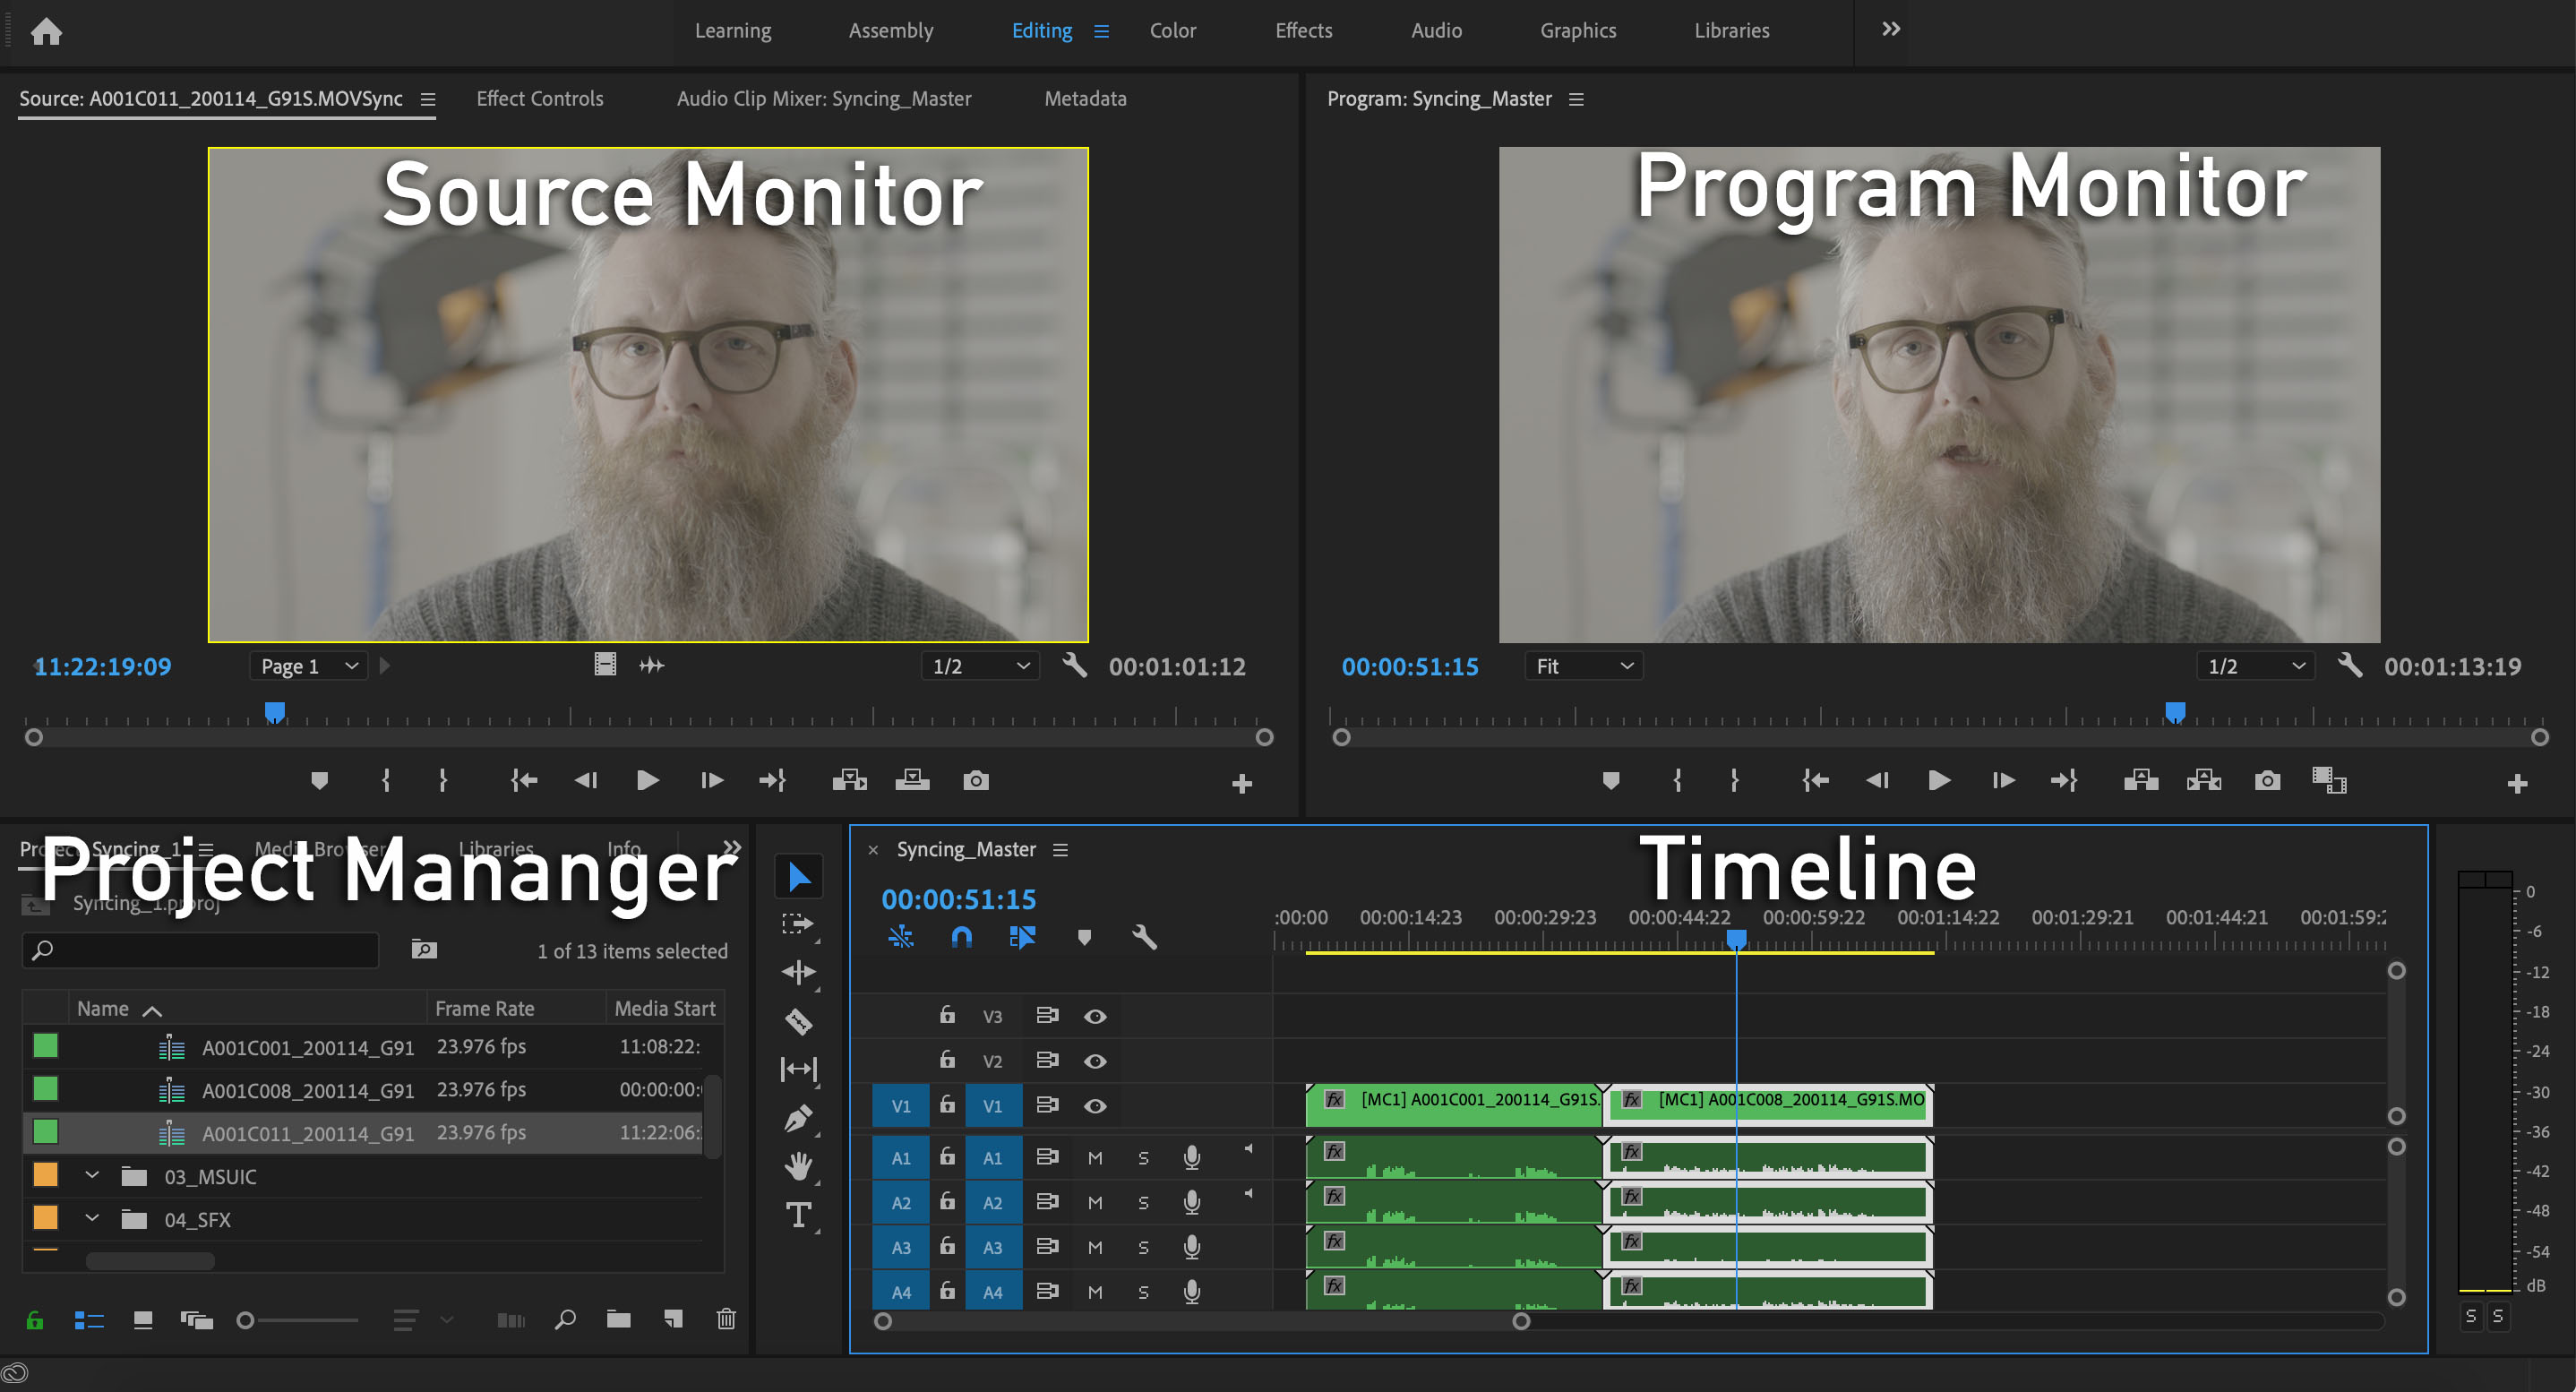
Source/Record Monitors and Timeline
Source Monitor: Here you can preview your source material and set in and out points before cutting the clips into your timeline.
On the right is your Program Monitor which previews your sequence. The play head at the bottom of the window mirrors the location of the play head on your timeline.
Below your monitors is the Project window and the timeline. The Project window contains the tabs for media, info, effects…etc.
The Timeline is the where all your clips go as you create your final project. You can have as many sequences as you want that can be edited together into a master sequence. For example if you were working on a documentary each act would be their own sequence and would than insert those finished acts into the final sequence. If you was working on a narrative each scene would have its own sequence than edit those sequences into the finished film.
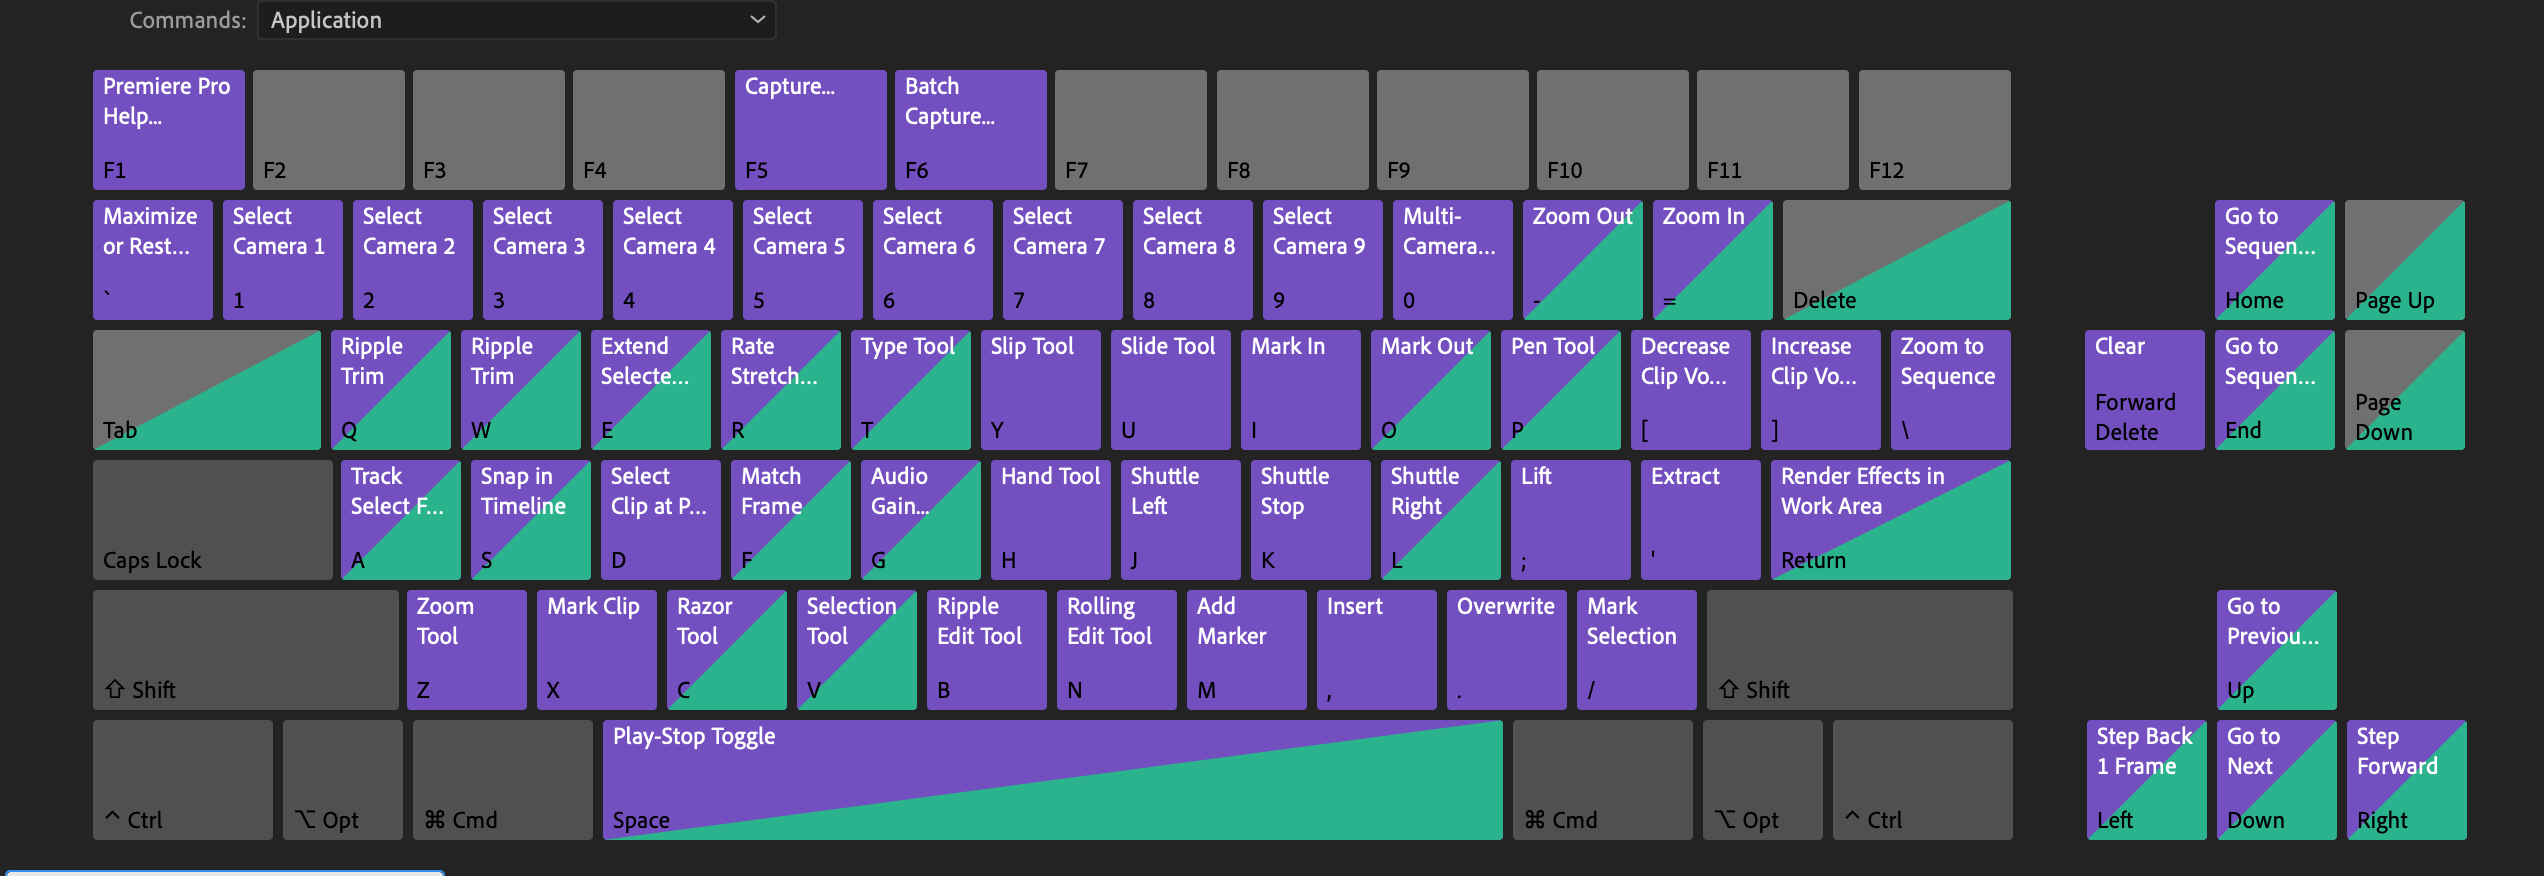
Keyboard Short Cuts
We recommend you learn some simple key commands as this will speed up your editing significantly. Some of these shortcuts are
- Mark In and Out (I and O)– Sets in and out point in both your source monitor and your timeline.
- Overwrite (.) – Takes your selected media from your source monitor and places it in your timeline where ever your play head is overwriting any thing that is on the selected track
- Insert (,) – Takes your selected media from your source monitor and places it in your timeline where ever your play head is. Anything that is on the selected track is moved down the timeline.
- Transport Control (J, K and L) – This will Rewind, Play/Pause and Fast Forward your play head.
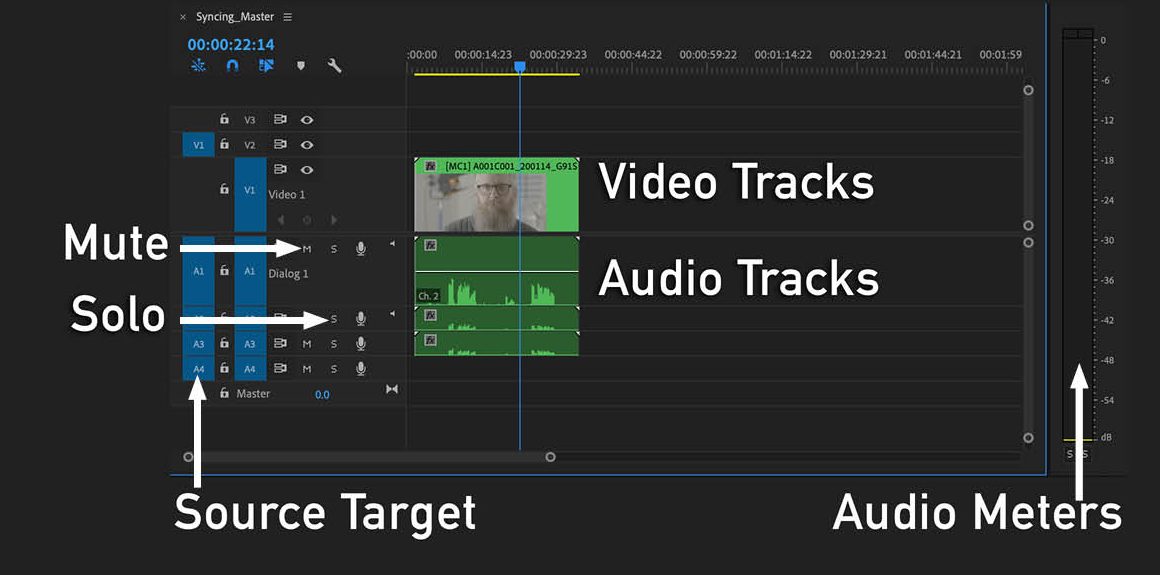
Timeline
In your timeline “Video Tracks” are on the top half and “Audio Tracks” are on the bottom half. To expand the track double click in the empty space to the right of the track. This allows you to see the track name, this also displays the left and right audio channels waveform, shows thumbnails on the video tracks, and you have access to the key framing tools. Key framing is used to automate the audio levels so it gets louder and quieter as needed.
The small “S” and “M” icons on the audio tracks allow you to “mute” a track or “solo”, a track, listening to just that track.
The “Source Target” sets what tracks clips will be inserted or overwritten on to.