Your edit is finished, now what? It’s time to export! We recommend that you first duplicate your sequence and rename it “Sequence Name + Export + Date” and set an in and out point for the length of your sequence. This way, you’ll always have a record in your project for the state of your edit at each export.
Navigate to File > Export > Media or use the keyboard shortcut “cmd+M”
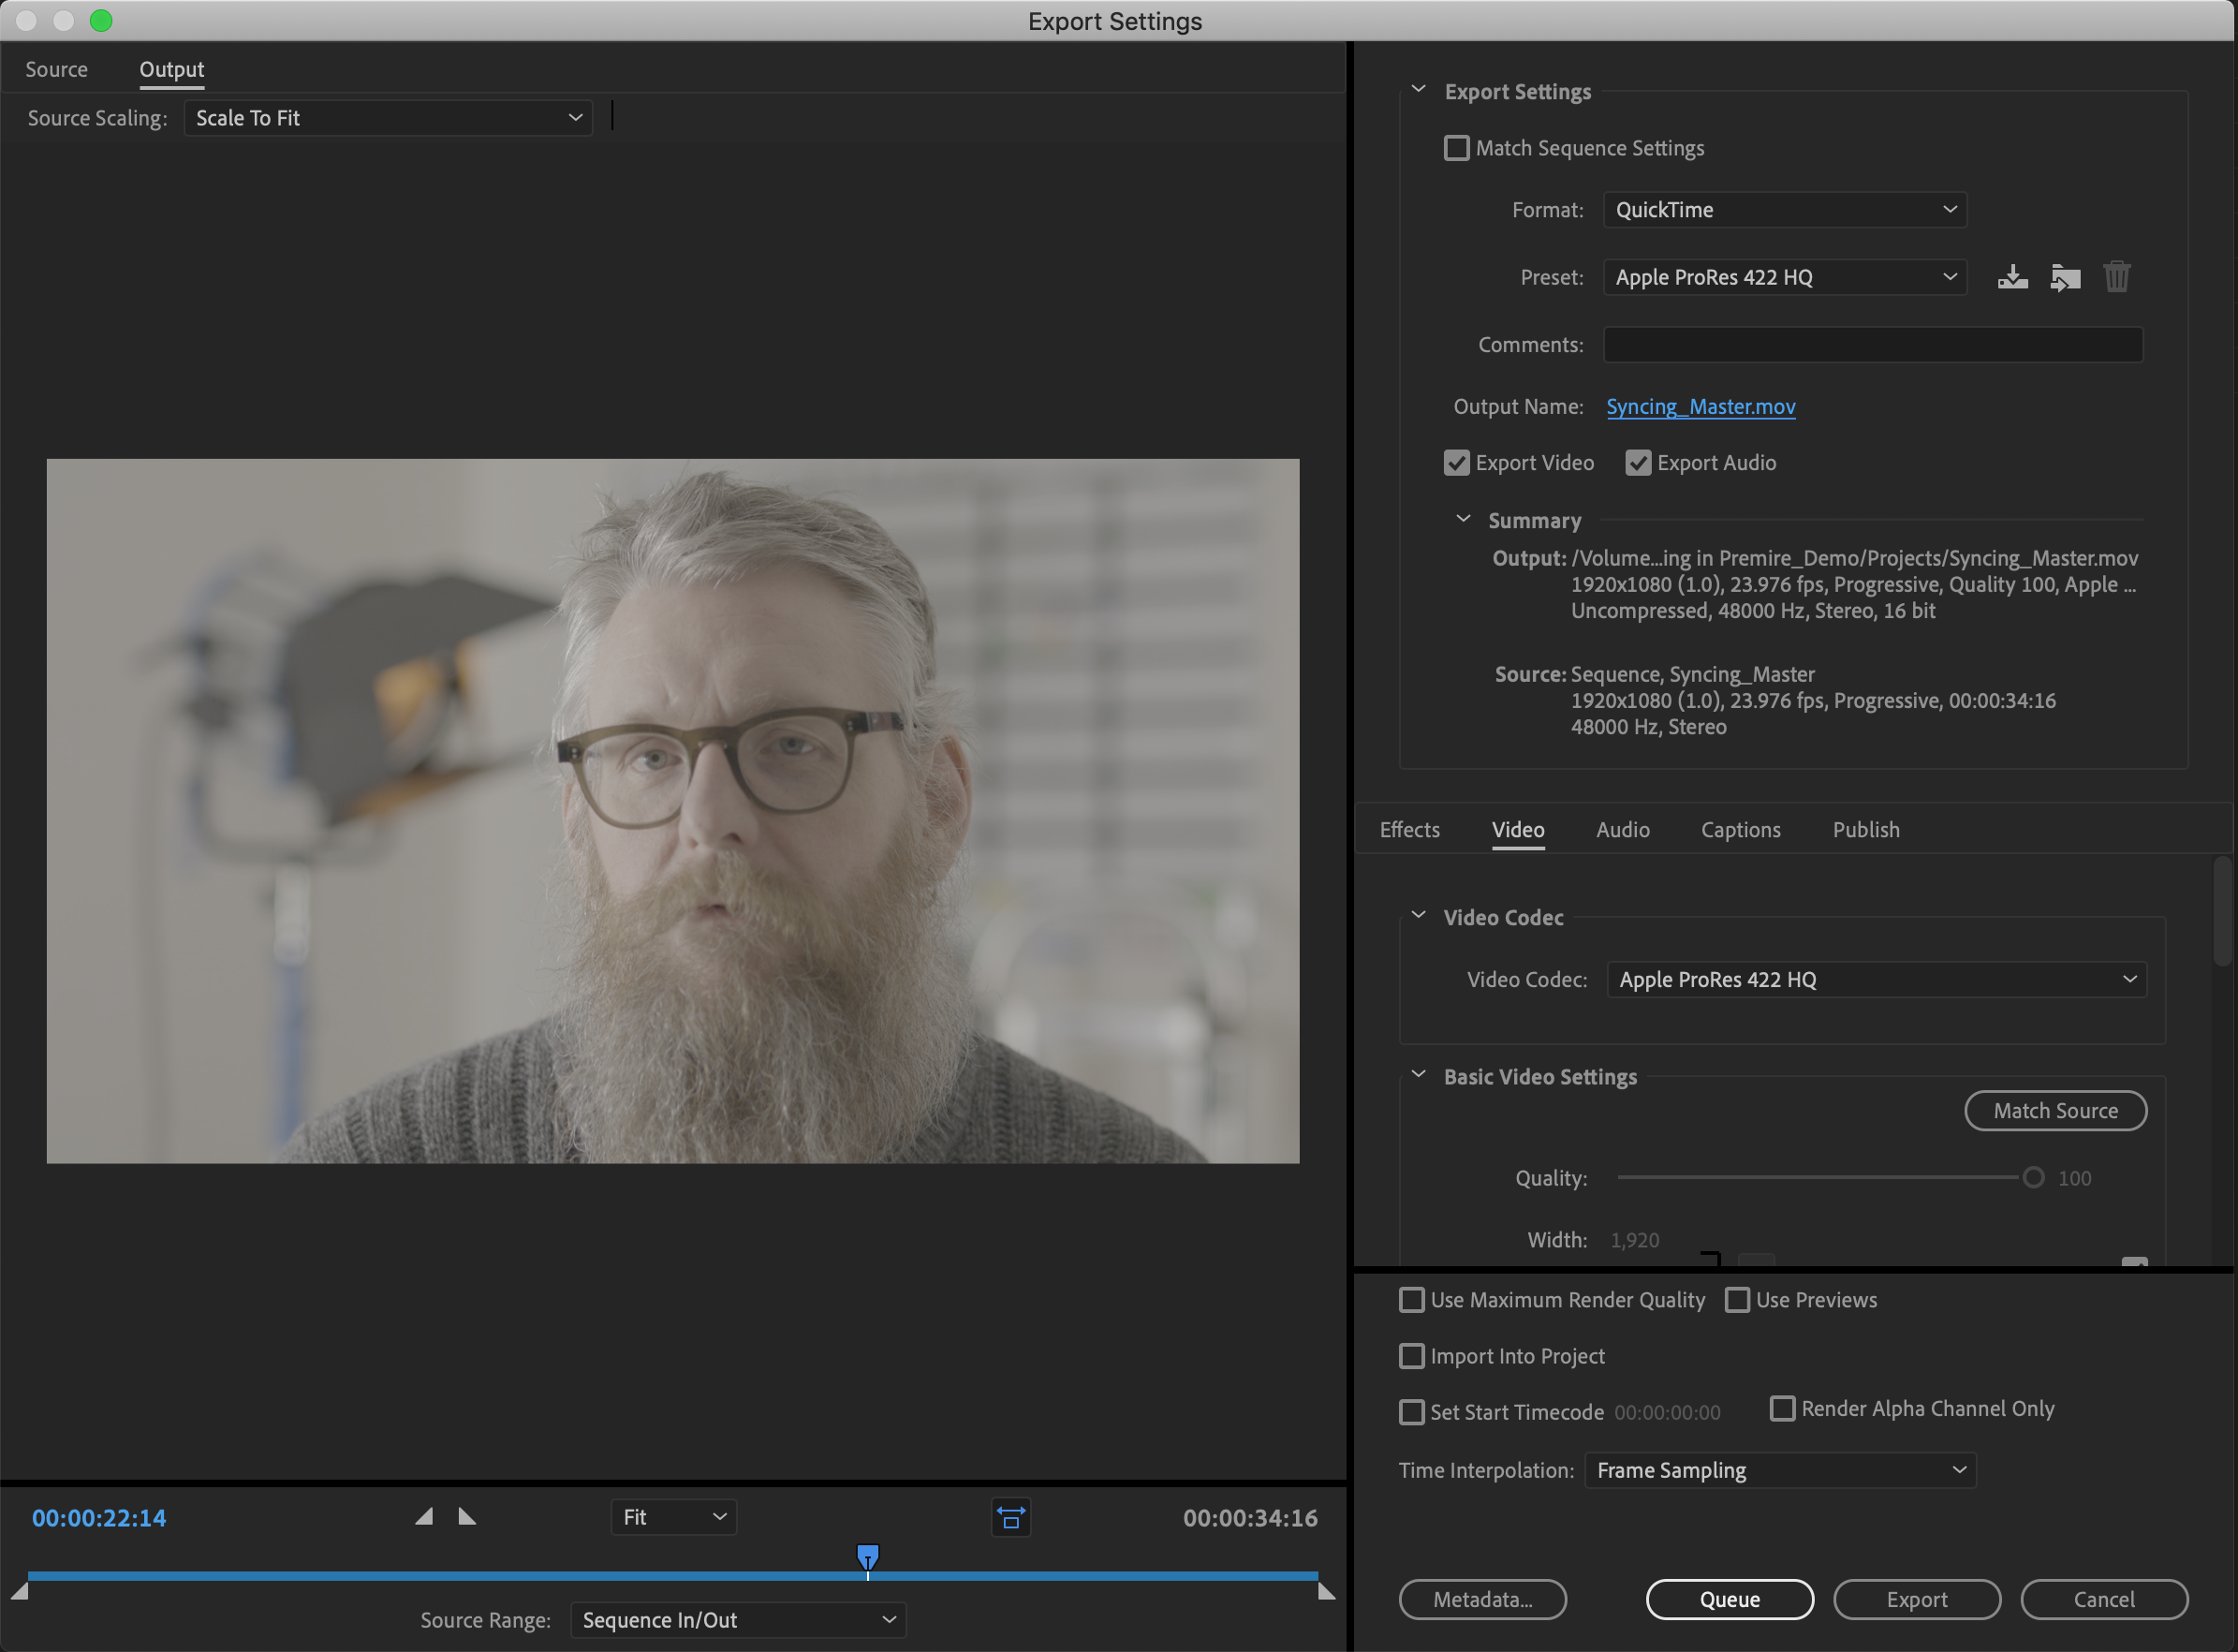
The Premiere Pro Export Settings dialog box is simple and easy to navigate.
- The blue text is your file name. Click on it to set an export destination and change it. A good file name (like “Proj_Export_200205”) tells you everything you need to know and allows you to keep track of when it was created.
- Select a format in the “Format” drop-down menu and a codec preset in the “Preset” drop down menu.
- Double check that “Match Source” is selected in “Basic Video Settings”
- Click the “Export” button at the bottom for the Export Settings dialog box.
Vassar Film production classes export in two different formats:
H.264 is the best export setting for in-class viewing and uploading or sharing. It’s a highly compressed codec so the file size is usually nice and small.
- Format: H.264
- Preset: High Quality 1080P HD
- Basic Video Settings: Choose “Match Source” or set resolution to “1920×1080” and “Frame Rate” to 23.98
QuickTime Apple ProRes 422 HQ is a less compressed intraframe codec. It’s a great format for archival and our Codec for Sr Workshop Showcases.
- Format: QuickTime
- Preset: Apple ProRes 422 HQ
- Basic Video Settings: Choose “Match Source” or set resolution to “1920×1080” and “Frame Rate” to 23.98