If you’d like to be put on key permission, please arrange a time for training and orientation with Baynard Bailey.
Depending on your level of experience, the training can vary in time from 30 minutes to an hour.
Environment Checklist
Humidifiers – please turn them back on if you turn them off
Fan in the back closet – timer switch
Pull the door closed firmly please.
Please dispose of your trash in the bathroom trash (studio trash can sit a long time)
Once training is complete, you will be on key permission.
A copy of the key is kept at the circ desk. Please return it promptly.
To enter Chicago Hall after hours will need swipe permission (need a 999).
Micro SD Card Procedures
Board MUST be powered down when you mount or eject the microSD card.
MicroSD card MUST be ejected from the OS on the iMac or your laptop.
Failure to eject properly can damage the media and your recording!
Getting Started
Make sure the correct microSD card is inserted and seated properly.
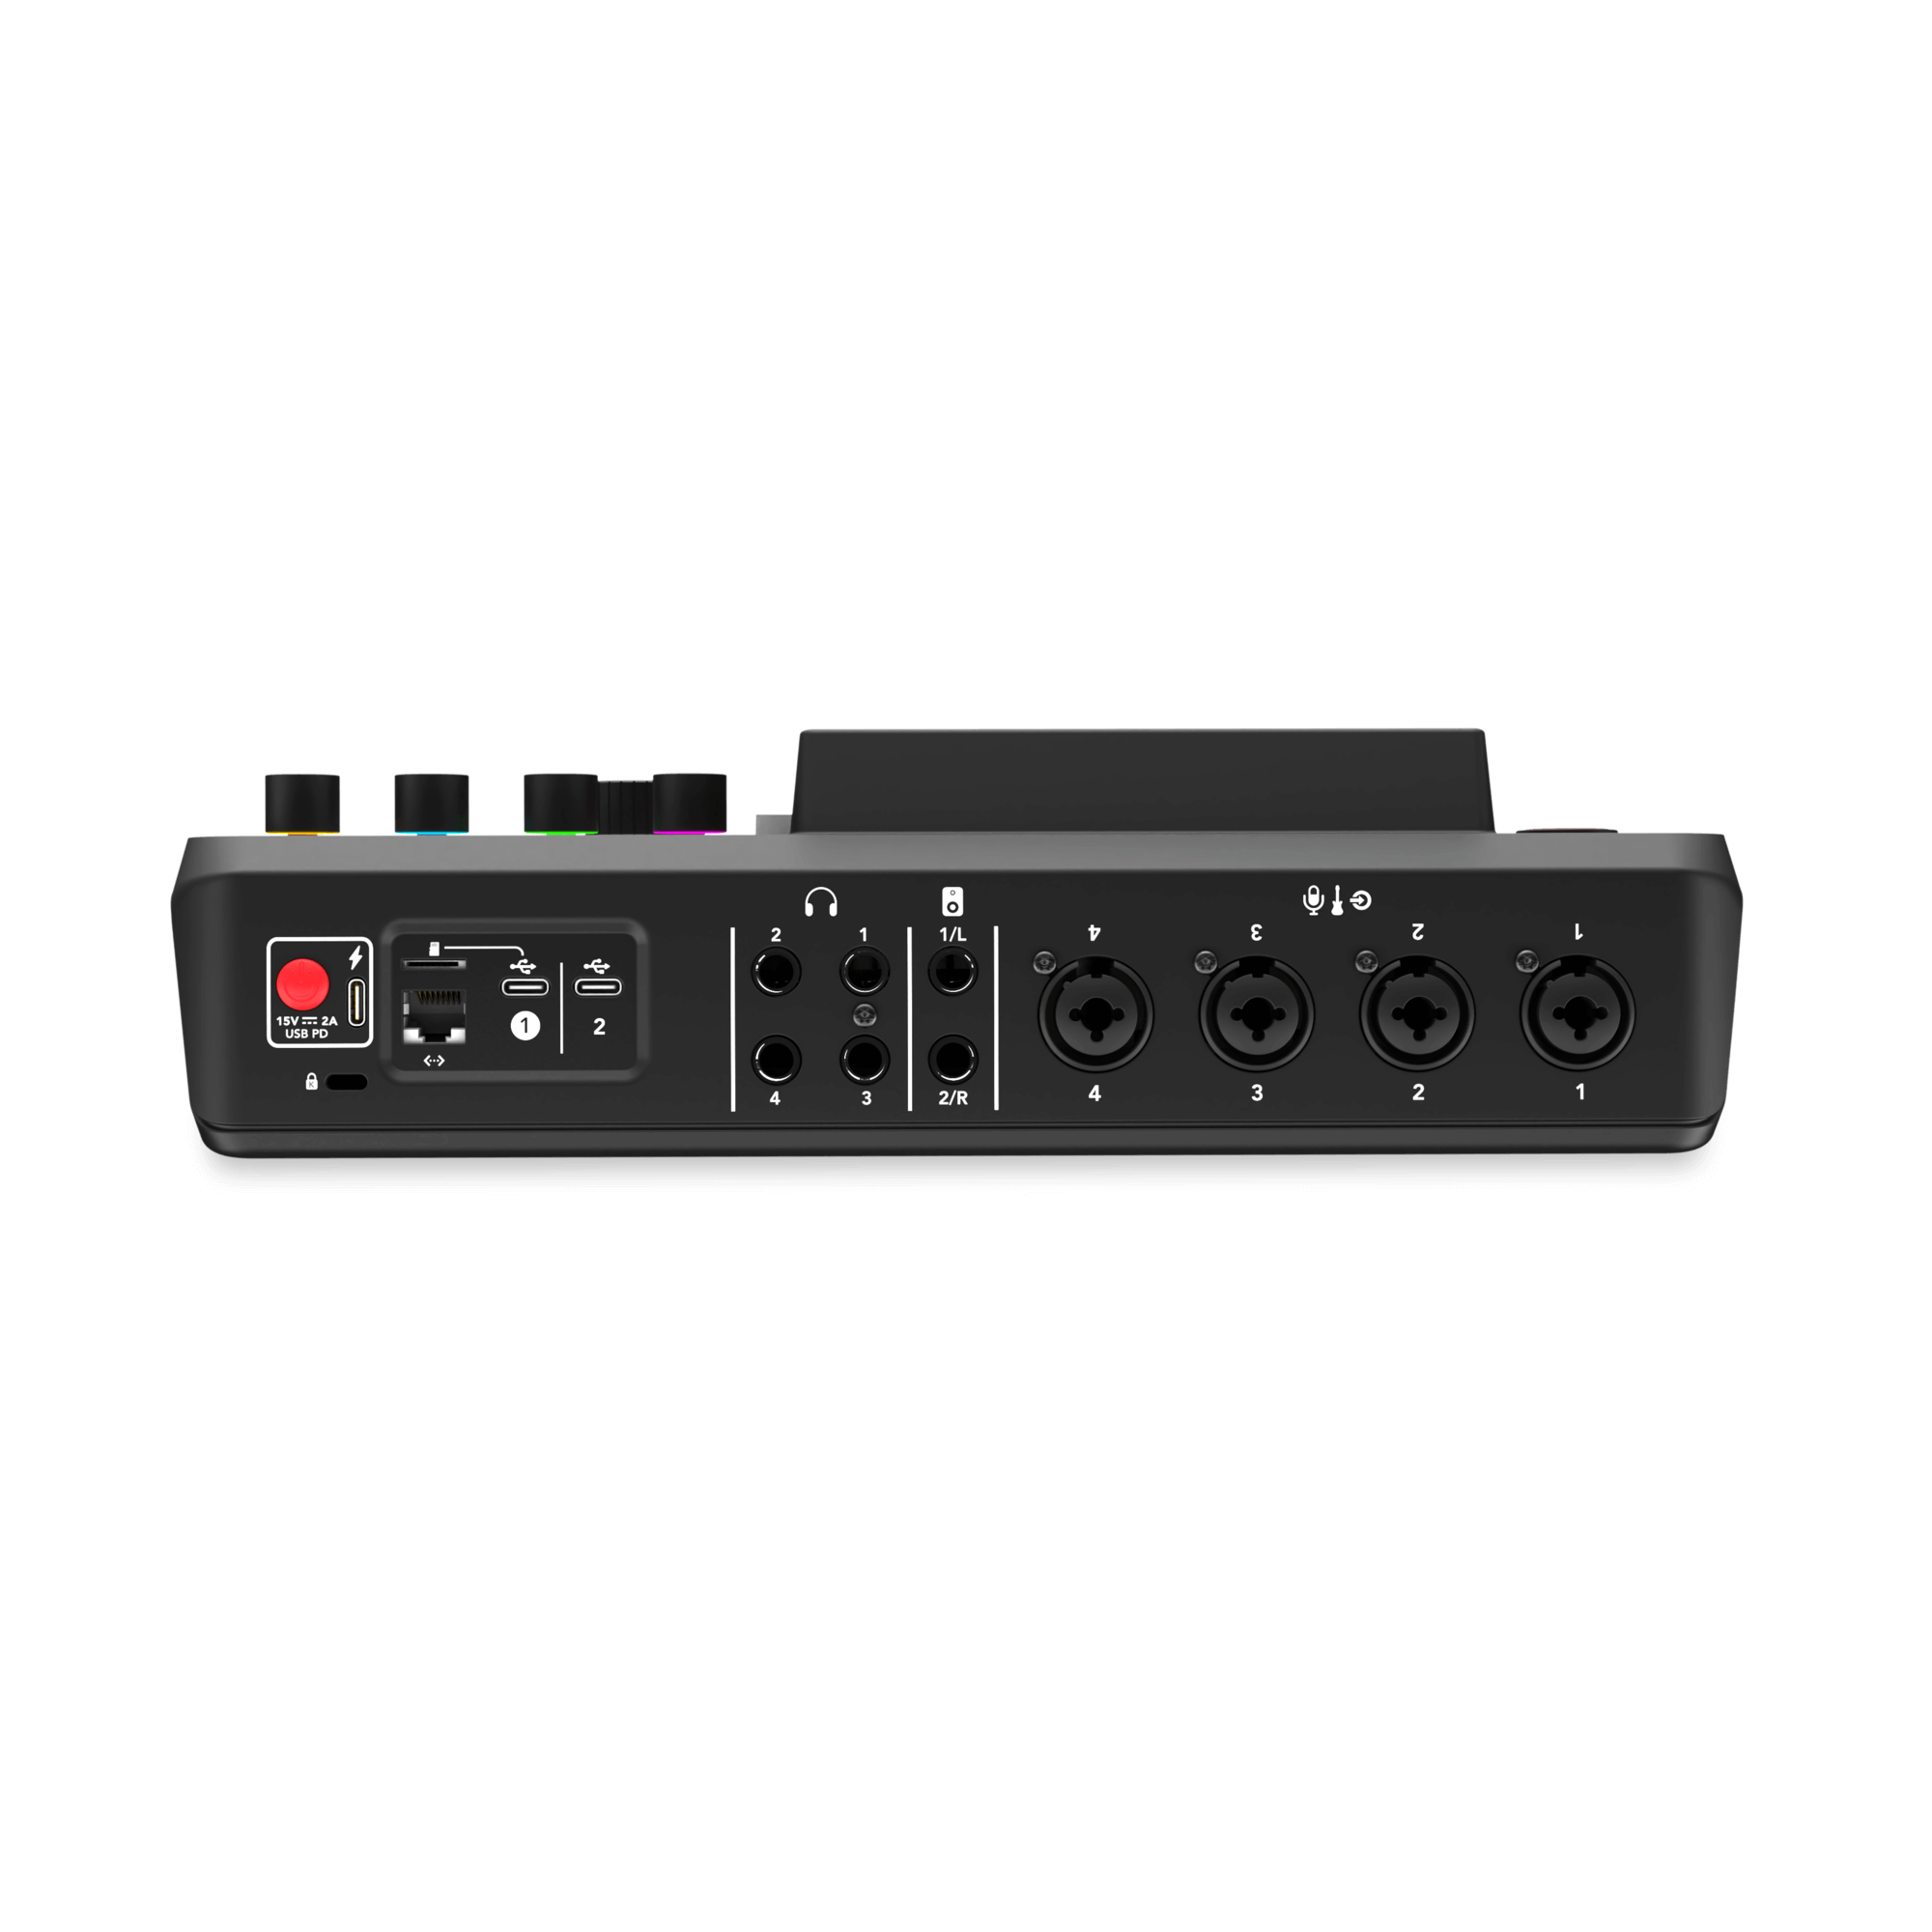
Press the red button in the back to turn on the baord.
Adjust headphones.
Bring mics to about a fist’s distance to your mouth.
Tighten mic screws as needed.
Make sure you are sitting comfortably, with hips and shoulders aligned.
I recommend having the headphones adjusted to to be a bit quiet.
I recommend having the mic gains above the nominal line.
The digital file tends to be quieter than what you hear while recording.
Board Overview
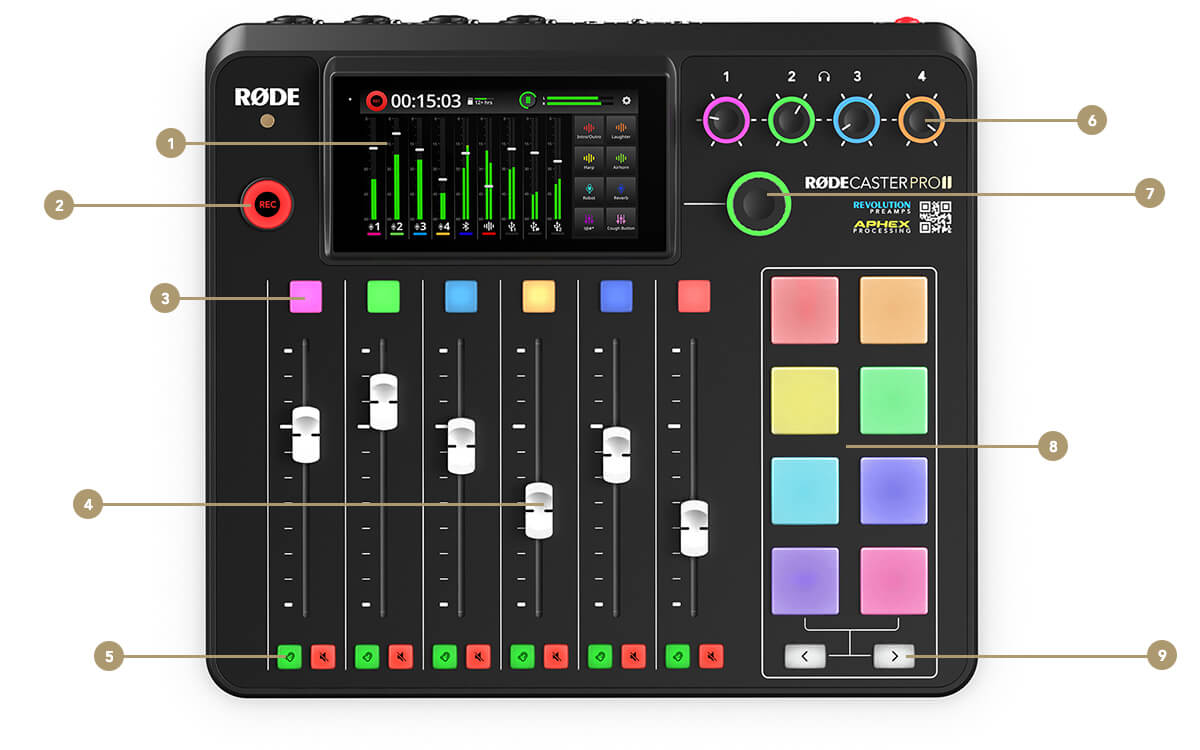
The first four slider bars control the four headsets’ gain, respectively.
Buttons (3&5) can mute mics or turn off headsets.
The big button (2) for starting, pausing, and stopping recordings.
Buttons (6) are for headset volume.
Buttons 8&9 control stingers and audio effects (the last slider is the gain).
All tracks are mixed down to one so get it correct on the board, can’t fix in post.