
Author: Steve Taylor
Adobe offers Creative Suite to Vassar students for free
FROM ADOBE:
Dear Students & Faculty,
As a result of campus closure, student access to Adobe Creative Cloud in labs and classrooms is not available. Adobe has provided temporary at-home access for impacted students and faculty, so that they can continue their work remotely. Please follow the instructions below to enable access to Creative Cloud Desktop Apps on your personal device.
- Visit https://creativecloud.
adobe.com and use your school credentials to sign in. - If prompted, select Company or School Account and then enter your password. Or provide your credentials in your school’s login screen.
- From the Creative Cloud website, browse for and download your desired app. Click Apps on the top of the page to view all apps.
For more information on how to download or install apps, see Download and Install Creative Cloud apps.
Using “Waiting Rooms” in Zoom to manage office hours
If you’ve scheduled a number of students to meet with you in sequence, via a single Zoom meeting, you can meet with just one at a time while keeping your upcoming participants in a virtual waiting room until you’re ready to meet with the next one. Here’s how:
You can find more details in this support article.
Setting up Office Hours in Google Calendar
In Google Calendar, you can designate time slots for which your students can sign up. Here’s how: (Scroll down for video)
- In your Google calendar, drag your mouse over the time period in which you want to set up your office hours.
- Click on “Appointment slots.”
- Give the event a title, like “Office Hours.”
- Determine the length of individual slots within this time period.
- Click on the pencil icon to edit the event.
- Set the repeat settings. e.g., every 1 week through December 29. Click “Done” to save your repeat settings.
- Enter location and description, if you like. Click the “Save” button to save everything
To send the invitation to your students:
- Click on any of the instances of your office hours.
- Click on the pencil icon again.
- Right-click on “This calendar’s appointment page” and, from the dropdown menu, choose “Copy link address.”
- You can email this URL to your students or create a link to it in your Moodle course sites.
Library’s Remote Learning & Library Services Guide
The Vassar library has created this Remote Learning & Library Services guide.
Students can now use Zoom Pro license
As of this morning (March 20), CIS has extended the Pro license for Zoom to everyone with a Vassar email address. This means that students can now create their own meetings and they instructors can designate students as meeting co-hosts or alternate hosts.
Additional Zoom setting changes:
- It’s now a default that meeting participants will need to be logged in (“registered users”) to join a meeting; you should only change this setting if you specifically need to invite a non-Vassar person.
- If you share the link to your meeting recording that’s saved in the cloud, users will need to log in with their Vassar ID to access it. (You can also require an additional password.)
- If you enable recording in your meeting, participants will be prompted to give their consent. If a student attempts to record the meeting to their local disk, the host will be prompted to give permission for that.
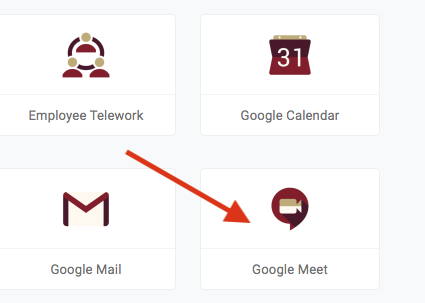
Using Google Meet
Most Vassar instructors who want to conduct online class meetings in real time are planning to use Zoom for that. However, if there are unsurmountable difficulties with Zoom, an alternative is Google Meet.
Here’s how to get started with Google Meet:
- Go to one.vassar.edu.
- If the Google Meet icon isn’t shown, click on “Search view: Everything.”
- Click on the Google Meet icon.
- Click on “Join or start a meeting.”
- Give your meeting a name.
- Allow Google Meet to access your camera and microphone.
- Click the “Join now” button.
- Click on “Add people.”
- Click on “Copy joining info.”
- Send or provide the joining info to your students.
How to Pre-assign Students to Breakout Rooms in Zoom
If you know how you want to group your students into breakout rooms, you can set that up beforehand, rather than spending time doing that during the meeting. Here’s how:
- Log in at vassar.zoom.us.
- Schedule a new meeting.
- Under “Meeting Options,” tick the box for “Breakout room pre-assign.”
- Click on “+ Create Rooms.”
- In the Breakout Rooms window, click the + to create a new room.
- With that room still selected, enter the complete email address of each room member, pressing Enter after each one.
- Repeat steps 5 & 6 until everyone has been assigned a room.
- Save the Breakout Room settings and then save your meeting settings.
After you’ve started your meeting, click on “Breakout Rooms” in your tool dock; you should see the room that you’ve created. You won’t see any people assigned to those rooms until after they join your meeting.
After your participants have joined the meeting, go to the Breakout Room configuration window and click on “Recreate” and then “Recover to pre-assigned rooms.” This will populate your rooms according to their pre-assignments.
Record a “Talking Head” Video using QuickTime Player
If you have an iMac or a MacBook, it’s easy to make a video (or audio) recording of yourself for your students to see. After saving it, you can upload it directly to your Moodle site (or upload it to YouTube and link to it from your Moodle site.)
This video will show you how to make a video recording. (If you prefer to make an audio-only recording, just choose “New Audio Recording” instead of “New Video Recording” at the beginning.)
Please share your experience or suggestions about using this function…
Make a Screen Recording, using QuickTime Player
If you have an iMac or a MacBook, it’s easy to make a screen recording– a video of what’s happening on your computer screen, with a voiceover audio track– for your students to see. After saving it, you can upload it directly to your Moodle site (or upload it to YouTube and link to it from your Moodle site.)
Please share your experience or suggestions about using this function…