History of Magnetic Card Stripes
The technology of “magstripes” has been around for a very long time, but there have been several important advances in the magnetic card reading technologies over the past few decades. The first official documented use of magstripes on cards is from the London Transit Authority who, in the early 1960s, installed magstripes on cards for the London Underground. In the late 1960s the USA was using magnetic stripes in cards for the Bay Area Rapid Transit. These “smart cards” were first patented in France in 1974. However, one of the most important dates for magstripes was 1970, where the standards were established for credit cards (which were first issued in 1951) and magnetic stripes became used. In 2011, financial and transit cards constitute the largest group of cards with magstripes, and they all follow the ISO standards to “ensure read reliability world wide.” Another more modern type of swipe card is the “smart card.” These are more secure than magstripe cards; they have a chip on the card that prevents the information from being damaged or stolen. These cards can have greater capacity than magstripe cards and have have broader information carrying capacities, that can be added or deleted, as well as being able to accomplish some more complicated tasks such as data encryption. Future uses of the magstripe could broaden into official documents such as passports, and one-swipe cards (a magnetic stripe card that has multiple purposes) are starting to become used more and more on college campuses throughout the country.
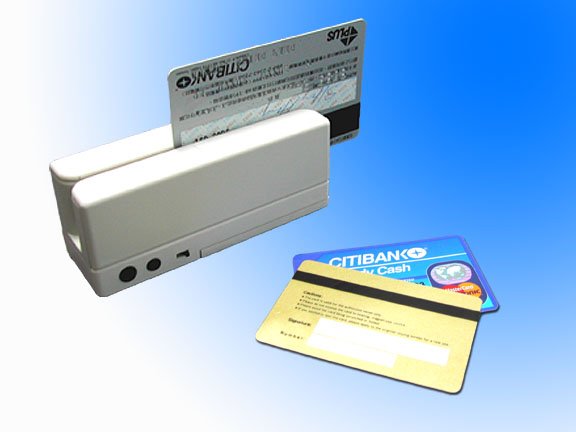
Magnetic Stripe Reader - credit to product image on DIY Trading http://img.diytrade.com/cdimg/99700/1133925/0/1200014156/Portable_Magnetic_Stripe_Data_Collector.jpg
Modern Uses of Magstripes:
Magstripes are used in a lot of different markets in modern day living. Some of these markets include Financial Services, Travel and Transportation, Health Insurance, and Education. Within these specific markets there are a vast variety of different types of magstripe cards. These include access cards (let you into buildings), bank cards (transaction processing), phone card (prepaid PIN cards), Credit or Debit Cards (revolving accounts that include a purchase transaction), and health cards (store personal medical history). At Vassar, every student has a “VCard” which is a one-swipe magnetic stripe card. That means that this one card can be used to access different information and perform many tasks such as buying food at different venues, gaining access to buildings, and has actual money stores on it. These types of cards are becoming more and more popular across college campuses worldwide.

Magstripes - Credit to Plastic Card Printing Canada LLC - on Wordpr
What Exactly is A Magnetic Stripe?
If you look at your student ID, ATM car, or subway ticket etc. you would notice a narrow black or brown stripe on the back of it. Essentially, this stripe is a very thin layer of magnetized material that has information stored on it. Magnetic material (also known as ferromagnetic material) is a material that retains properties of a magnet even after an external magnetic field is removed (all N-S poles are aligned in the same direction).
You must be wondering, what is this magnetic stripe made of, and how did it get there?
Well, a type of metal (usually iron oxide or barium ferrite) is ground up into a fine powder. Then, it is combined with a plastic-type of material in a liquid consistency. Then, the solution hardens and is either laminated or stamped onto a card.
Different types of magnetic materials used on cards have different coercivity. Coercivity is the measure of the resistance of a magnetic material to becoming unmagnetized. Typically, there is low coercivity and high coercivity. It follows that high coercivity material is more difficult to encode information on. Therefore high coercivity magnetic stripes contain information that is more difficult to erase, and they have a practical use for cards that need a long life. Hence, low coercivity magnetic stripes are easier to encode information on, and easier to erase information on. High coercivity magnetic stripes are usually black and made of barium ferrite. Low coercivity magnetic stripes are usually made of iron oxide.
How exactly is information “encoded” onto a stripe of metallic material?
Solely having a stripe of metallic and “magnetic” material on the back of a card does not mean that the card is able to have useful information stored on it. The stripe has to go through a process of magnetization first.
Essentially the stripe acts as a bar magnet. One end is a north pole, and the other end is the south pole. Though, as noted before, the stripe is made up very small magnetic particles (20 millionths of an inch). So, on a small scale, each particle acts as a tiny bar magnet, and because they’re aligned in a N-S direction, the entire stripe is a bar magnet.
Though, when the magnetic stripe is placed in a very strong external magnetic field (of the opposite polarity – so if the magnetic stripe was N-S, the external field is aligned S-N) then the polarity of the particle(s) on the stripe are flipped. This action of flipping the magnetic field on the stripe is what “encoding” information is.
This process of encoding is done by a solenoid. A solenoid is a coil of wire, in which a current is run through, which creates a change in magnetic flux, which then creates an induced magnetic field inside the center of the coils in the solenoid.

Solenoid with current and induced magnetic field - Credit to Joseph Becker of San Jose State University - link on image.
The solenoid has the ability of producing an extremely strong magnetic field in a very small area. So, if current is run in one direction, a magnetic alignment is thereby created on the stripe. But, in order to have some type of data stored on the card, the current in the solenoid must alternate in opposite directions very quickly, so varying opposite magnetic field alignments are created in very small areas, in very short amounts of times. So instead of having a stripe that has no data, (particles are aligned N-S-N-S) the solenoid creates a difference in magnetic alignment (particles are aligned N-N-S-S-N-N) The N-S poles of the particles in the strip are reversed, and now data can be stored in binary code (1’s and 0’s—like a computer).
The Physics Behind Encoding Magnetic Stripes
There are a few laws in magnetism that govern how current, voltage, and magnetic fields are related. First off, I should define these terms.
Magnetic Fields: (also known as B Fields) It is created at all points surrounding a moving electric charge.
A certain law, called the Biot-Savart Law describes how a steady electric current creates a magnetic field:
![]()
B is the magnetic field
Mu naut is a constant for the permeability of free space = 4pi * 10^-7
V is the velocity of the moving charge
r-hat is the distance vector from the charge to a point of interest beyond the charge.
Q is the magnitude of the charge (measured in coulombs)
In this equation one takes a cross product of the velocity and r-hat vectors to get a value for the magnetic field.
There are many other equations that could be derived for specific situations such as a straight line of current, but I need not go into that for one can simply use two simple rules to find out the direction of a magnetic field.
Right Hand Rule 1: take your right hand, point your thumb in the direction of the current.Picture the current going through a wire, then curl your fingers around the wire. Your four fingers point in the direction of the magnetic field produced by the current.
By applying this rule to the diagram of the solenoid, you can follow the current flowing through the coils with your thumb and see that the magnetic field points in a single direction no matter where on the coil you put your hand. Then, one can see by changing the direction of the current (alternating current), then the magnetic field changes direction accordingly. This is how a solenoid can quickly and effectively achieve pole reversals.
What exactly is happening when you swipe your credit card through a card reader?
The process of swiping a card through a reader uses a few simple principles of physics. Faraday’s Law of Electromagnetic Induction explains this mechanism.
Faraday’s Law:

Faraday's Law
Epsilon (E) represents the EMF, otherwise known as the electromotive force – it is equivalent to a potential difference, or, voltage.
D(Phi)B represents a changing magnetic flux. A magnetic flux is the measure of the amount of magnetic field passing through a given surface.
D(t) is a change in time.
So, this equation tells us that a changing magnetic field in a given amount of time produces voltage, which in turn can create a current in a pickup coil (in the card reader).
So, as noted before, the magnetic stripe has varying magnetic field orientations along the length of the card. If the card is moved through a card reader (basically, a pickup coil (which is a closed loop — essentially forming a circuit)) then a change in magnetic flux is produced in one direction. A change in magnetic flux (which in this case is a very short amount of time, because the card has many differently oriented magnetic fields passing by the pickup coils, induces an EMF, or, a potential difference. (as noted by Faraday’s Law).
Furthermore, because a potential difference (because of a separation of electric charges on the pickup coil) is created, then, by using Ohm’s Law, you can see that a current is induced in the pickup coil.
Ohm’s Law:
![]()
V is voltage, which is essentially what a potential difference is, which is what an EMF is.
R is the resistance of the material (resistance to movement of electric charges within the material). So in this case we’re concerned with the resistance of the pickup coil.
I is the current, which in this situation is induced by the potential difference created in the coil.
The current received by the pickup coil goes through signal amplification, and is translated into binary code (the alternating magnetic fields do this) so that the signal could be read by a computer.
Of course, this is an extremely simplified explanation of how information is stored on magnetic stripes and received by pickup coils, but these principles of physics are fundamental to understanding the mechanisms behind it.
n magnetic data storage, there is always a risk of getting personal information lost. Unfortunately, the public remains largely uninformed on how criminals do this. This post will help clarify how crooks steal the important personal information of the public.
Protecting Yourself From Card Identity Theft
On a magnetic data storage card, which will be referred to as mag-swipe card for easier usage, there are three “data tracks.” Each track contains a certain amount of information, something that will be clarified more below. Track one typically stores the account number, cardholder’s name, and the expiration date of the card. Track two was developed by the banking industry and typically stores a copy of the first track but without the name of the cardholder. Track two also has a “service code” which relates to security functions, such as what type of transaction is permitted. For example, cash only, goods and services only, or ATM with PIN verification only.
Below are examples of how information appears on magnetic strips:
Track 1 – 76 alphanumeric characters
– Start sentinel = %
– Format code, B = bank/financial format
– Primary Account Number (PAN), up to 19 digits
– Name, 2–26 characters
– Expiry date
Example: %B0123456789123456^MR A SMITH^0612…?
Track 2 – 37 numeric characters
– Start sentinel = ;
– Primary Account Number (PAN), up to 19 digits
– Expiry date – four characters
– Service code – three characters (sss)
– Discretionary data (DD) – PIN/card verification
Example: ;0123456789123456=0612sssDD…?
Track 3
• Not usually used for financial transaction cards
• Track 3 – 104 numeric data characters
– Start sentinel = +
– Field code (FC)
– Primary Account Number (PAN), up to 19 digits
Example: +FC0123456789123456=…?
[From: http://tiny.cc/hlpfc]
There are many ways to read mag-swipe cards, from pocket devices to devices incorporated into keyboards. Unfortunately, the variety of these devices enables many extravagant fraudulent activities; some of these activities will be highlighted below.
It is quite common for other equipment to be used in association with the skimmers; these are used to obtain PIN number details. Typically a camera would be used and positioned above the keypad area on the ATM machine to record the PIN number. During that time the camera would record all users of the machine entering their PIN. This information can then be easily correlated with that obtained from the skimmers by synchronizing the clocks.
Technologies are being created to help defeat the skimming techniques aforementioned. One example of this is the “smart chip” which has been incorporated into many cards. This provides a more secure method of data storage than the mag-stripes do. Contact smart cards contain an array of gold metallic contacts connected to a silicon chip in the card. The chip include a microprocessor, an encryption / decryption engine, as well as a “Read Only” memory. The Read Only memory contains the operating program and a small amount of reusable memory.
A video of one of our unsuccessful tests:
MVI_0015 << (click this link)
Project Conclusions
After a number of card swipe tests at varying velocities, we averaged an idea card swipe velocity to be in the range of 0.17 – 1.8 m/s. For obvious reasons, swipes that were too fast, or two slow didn’t work. We postulated that the slow swipes were moving too slow to create a quick enough change in magnetic field, so that no current was induced in the card reader. For fast swipes, we postulated that change in magnetic flux was too rapid to be discerned by the card reader.
In the end, with principles of electromagnetic induction in Faraday’s Law, The Biot-Savart Law, and Ohm’s Law, we’ve shown how data magnetic stripes is created.

How To Read Your Own Credit Card - credit to http://www.ebookpart.info/Magnetic-Stripe-Reader_3332.html
Document Sources:
Cole, David John. Schroeder, Fred E. H. Encyclopedia Of Modern Everyday Inventions. Greenwood Publishing Group, Inc. Connecticut, 2003. 38-41.
Rankl, Wolfgang. Effing, Wolfgang. Smart Card Handbook. John Wiley & Sons Ltd. UK, 2010.
Green, Stephen. Magnetic Stripe: Back Up for Passports? Biometric Technology Today. Volume 12, Issue 7, July-August 2004, Page 5. Science Direct.
Historical Overview of The Card Industry. High Tech Aid. http://www.hightechaid.com/tech/card/card_history.htm
Masters, Gerry. Turner, Phillip. Forensic Data Recovery and Examination of Magnetic Swipe Card Cloning Devices. Digital Investigation. Volume 4, Supplement 1, September 2007, Pages 16-22.


